Monday, October 16, 2006

Prairie Points in Progress

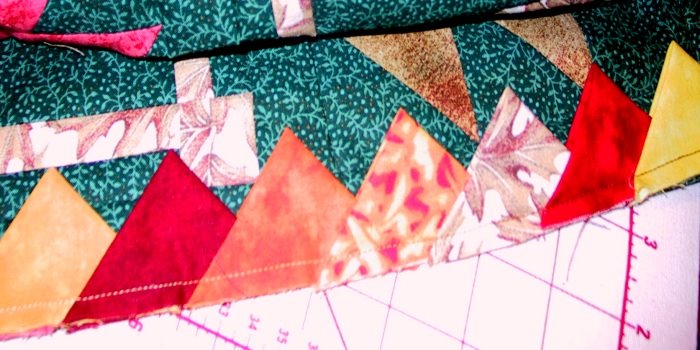
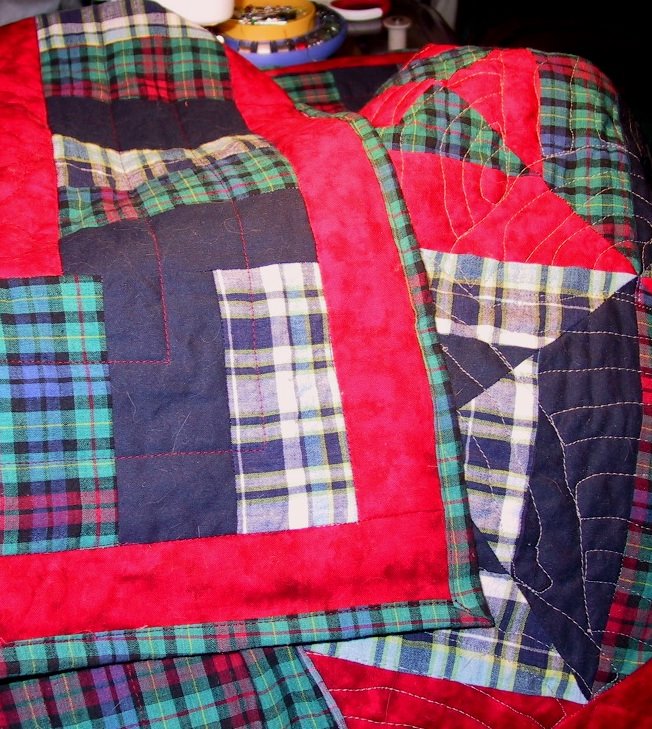
Well, here's what I've been doing this weekend. Ironing more than 100 little 3 inch squares... folding them on the diagonal, ironing them again... folding them on the diagonal AGAIN and ironing them one last time. Uggh, you KNOW how much I love to iron.


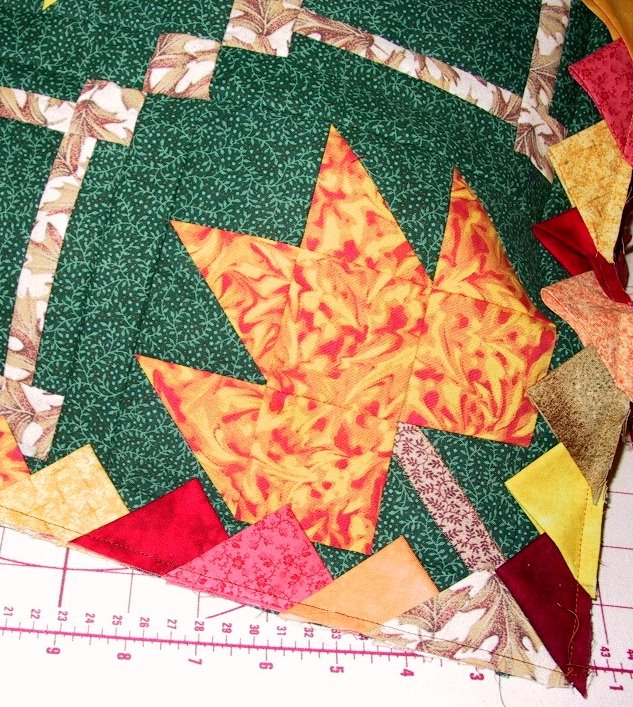
Then I pinned them point-in to the border of the leaf quilt. It took me a few tries to decide exactly how far I wanted them apart. I finally decided to nest each one half way into the one before it.


I also decided that I was anal enough to want some kind of pattern, especially with the red, they seemed to jump out more to my eye. So I have a dark red triangle, three random triangles between, then a medium red triangle, and three triangles.


Spacing them halfway into the next one meant that I was continually sewing through 9 layers of fabric. I bet if you want them closer than that, you've really got to have a powerful machine!


I hope the corners work out when I flip them open. I did find a website that suggested matching them like a miter, almost, at each end, so that's what I did.


I've done two corners so far... another 1½ sides to go!

Friday, October 13, 2006

Prairie Point Questions

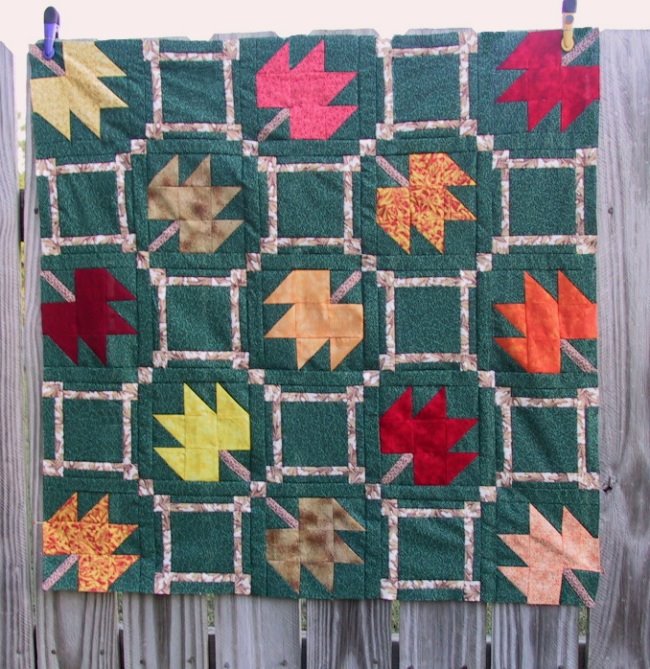
With final border on, the leaf quilt is 36 inches square (36½ unfinished). I've cut my scrappy squares from all my various leaf fabrics, at 3 inches square. I think I like the look of the points with the opening on the side, that are 'nested' into each other ... but I have some questions.


Does anyone have any hints on how many points look best per side? Should I really nest them deep into each other or only slightly, ½ inch or so? Do I have to pin a whole yard of these before I sew them? eww.

Will it look better if I stick to a pattern of colors for my points? I have 11 different fabrics... or will it look too regimented? But, if I do the color order randomly, some of the colors are brighter or darker, will they draw the eye and look funny if (example) the deep red points are only two points apart on the left side... and spaced by 8 on the bottom, and by 5 or so on the right?

Do people normally put these points on after you quilt the sandwich or before?

Have any of you ever put the quilt top and the backing right sides together, stitched the edges, then turned the whole thing inside out? That way my points would be caught in the seam... but where does the batting fit? I can just see it snagging on the pressor foot if I put it on top ... or getting mangled by the feed dogs, on the bottom.

Advice, plz?

Wednesday, October 11, 2006

I'm an Autumn

Got the link for this from Finn's blog, guess I'm an Autumn too. :)

You Belong in Fall

Intelligent, introspective, and quite expressive at times...
You appreciate the changes in color, climate, and mood that fall brings
Whether you're carving wacky pumpkins or taking long drives, autumn is a favorite time of year for you


I think I've decided to try prairie points on the border for this little leaf quilt... it'll add color to the edge without adding much size. And since it's going to be a wall hanging, it'll let me try the points without committing myself to a whole bed size quilt worth of them. :D

Actually, I'm not sure what to do with the points at the corners, but I guess I can do a search online and find some instructions.

Sunday, October 08, 2006

Inner Squares

I did some extra time on Judy's 'hour a day' quilt today, since I had a nice free afternoon and a couple of DVD's to watch. Besides, I've got a board meeting tomorrow after work, and won't sew at all. Here we go. :)


Now for the borders. I'll do an inner solid green one, same size as the sashing, I think, so the leaves and lattice float. Then - still not sure what I want to do with the outer border. I've got plenty of that lattice color, and enough of several of the leaf colors. Lessee, got a choice between that Red/Orange/Yellow swirly stuff... the orange on the right side middle, and the red immediately above it. All the rest of the leaves came from FQ's, so unless I do something pieced, not enough of those.

I'm kind of leaning toward the lattice fabric, beige with brown leaves... what would YOU pick? Then bind it in... more green? A pieced binding? *thinking*

Saturday, October 07, 2006

Leaf Blocks done

I've been working away, just not posting. :)

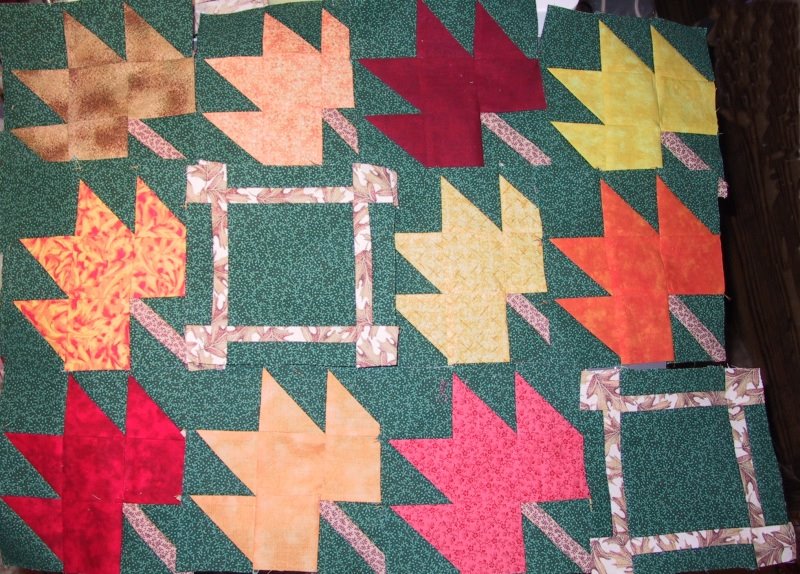
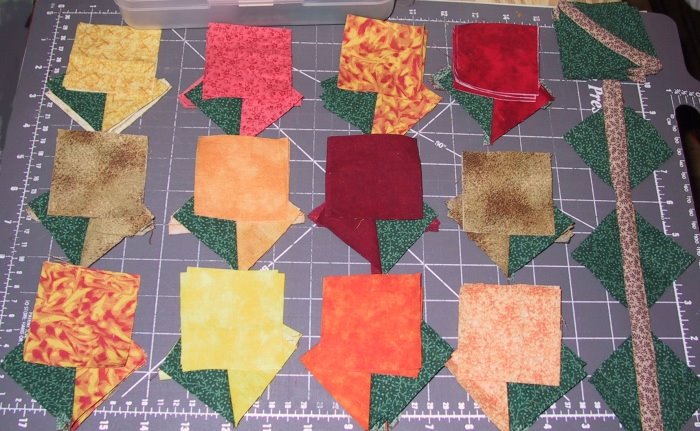
Here's my 13 leaf blocks done (the three on the left are the ones I have duplicated) there's two in each of those stacks, making the 13 I'll need. That one on the bottom isn't really pink, it's more of an orangey red than it looks.


And I've done 6 of the lattice blocks I will need, three in each stack. I've got pieces of the other 6 done, two sides and the middle, just waiting for the top and bottom strip. Then I'll get started on my sashing! If only I didn't have to work all day Saturday... *sighs*

Wednesday, October 04, 2006

Quilt for an Hour Two

My progress today on Judy's Hour a Day Autumn quilt:


I got all the paper torn off all my triangles. I rotary cut the three color squares, and the two background squares for each leaf, AND cut the background green squares for each lattice block. Then I got industrious and cut the stem fabric, seamed it together into a tube, and machine appliqued it down diagonally to 13 of my background squares. I LOVE the little applique stitch on my new machine, this is the first time I've used it. Well, I didn't get the instruction book out, but I used #34 on quilting mode, for you Janome folks, and it looks good to ME. :D

I've still got to cut the last three stems apart... and *confesses* I'm procrastinating on my least favorite job... anyone remember? It'll be the first thing I do when I get home from work tomorrow night, I Promise! Then I can reward myself by sewing my leaf blocks together.

Tuesday, October 03, 2006

Quilt for an Hour project

Well, here goes!

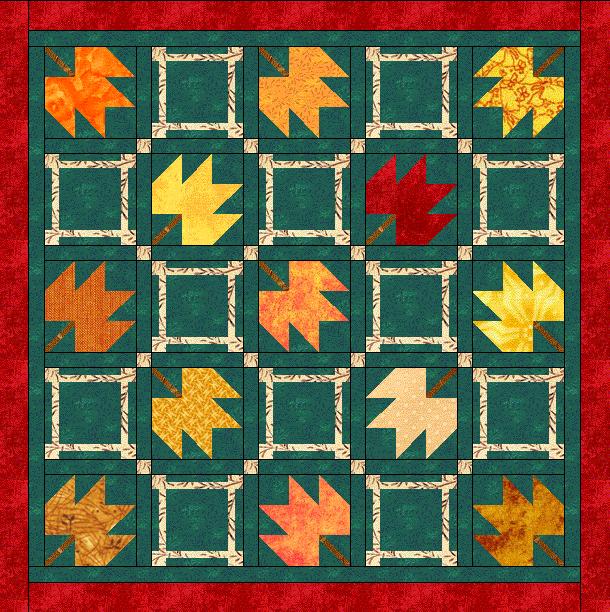
I'm making mine a little different from the one Judy designed - Making it smaller, 6 inch blocks sized for a wallhanging, adding sashing between the blocks, and using my favorite color as background, forest green, of course! My beige for the lattice is an oak leaf print, tans with brown leaf outlines, that should look like the fabric I found in EQ. Here's what I adapted from the EQ file Judy made available:


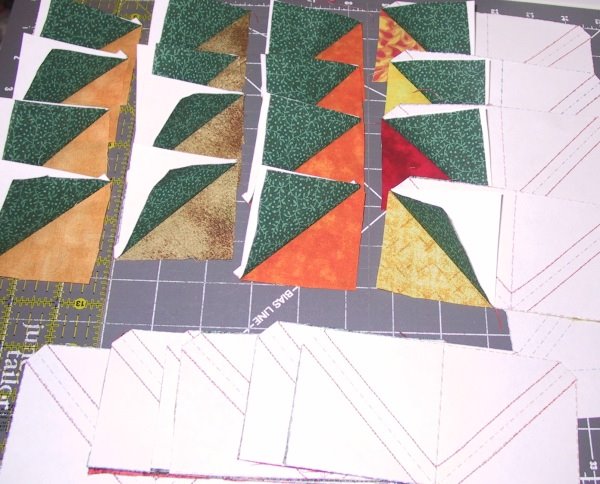
Sunday night I drew out my hst paper in Corel, and printed up enough for all my triangles. Tonight I cut my strips for the leaf triangles and sewed them to the paper, tomorrow at work I'll tear off all the paper on my break. Then my least favorite job of all, iron them. :(

This is what they look like now:


I'm repeating 4 of the colors, one red, one orange, one brownish gold, and the marbley red-orange-yellow that's my favorite. All the rest are different, but heavy on the orange variations.

Saturday, September 30, 2006

Guild Ostrich, final round

Well, for those who have been following my guild's round Ostrich, here's the final page. Anyone willing to proofread it?

October Ostrich Round

And for everyone of you who've provided webpage feedback, suggestions, and corrections before, THANKS!

Now for the meatloaf solution - you guys are so smart, several of you got it right, first guess! Yup, I have a top half, an onion layer, and a bottom half to this leftover meatloaf, three distinct and separate layers. Being single, I make a fairly flat meatloaf, not big tall plump ones, or I'd be eating meatloaf forever.

It was really tasty, though... lol Meatloaf crumbs anyone? I guess I'll have to add some sauce and have sloppy joes tomorrow. :)

Friday, September 29, 2006

Starry Night Design and Onions

I'm so excited. :)

I don't know how many of you have EQ5, the quilt design software, but they have a listserve sponsored by planetpatchwork that I subscribe to. EQ announces challenges and contests and discusses tips for using the program. ANYway, to make a long story shorter, they had a contest to design a quilt for the back of the box for the new version of Electric Quilt that will be coming out in a few months, EQ6.

I missed the deadline for the contest, even though I'd considered sending something in - but then a few days ago, Penny (who works for Electric Quilt) e-mailed me and asked if I'd give permission for one of the quilt designs I'd sent in for an earlier challenge to be used on the new software box. Of COURSE I said yes. Here it is .... :)


I don't do much applique, so this is a design I'd probably never make in fabric. The theme of the challenge I designed it for was Stars. When I first saw the theme, it made me start singing Don McLean's song Starry, Starry Night. I went to go look up Van Gogh's painting on the internet, and tried to do a version of it using the EQ5 software. Anyway, that's MY exciting news for the week. :D

Other information you could use - I was talking meatloaf recipes with a friend, and she said she put slices from the center of an onion on the bottom of her meatloaf pan, then dices the two ends of the onion up fine, mixes it with the meat, eggs, etc. Then I was talking on msn with Ann-Sewsalot and SHE thought it might be even better if the onion slices were in the center of the meatloaf. Well, Ann's a pretty good cook, so I thought, why not? I put about half of my meat-mix in the bottom of my loaf pan, arranged three onion slices on top of that, down the middle, then put the rest of the meat on top.


Patted it all smooth, put it in the oven to bake at 350° ... can anyone guess what happened and why it'd be better to have put the onion slices on the bottom?

I think I'll be devious and make you all guess before I tell you. :)

Monday, September 25, 2006

Pincushion

Well, no, I haven't fallen off the quilt blog, just got busy! Got some new bifocals, and am trying to get used to the different 'wavery' look on the bottom. But they were WONDERFUL for hand sewing the label on my plaid quilt. :)


Here on the left is what I really use for my pins, I found that my little magnetic holder exactly fits inside my catproof bobbin holder. There's both metal and plastic bobbins in there because, yes, my Janome does fit the bobbins from my old Kenmore. (And of course, I found that out AFTER I bought a pack of twelve bobbins at something ungodly like 50 cents each.)

The gray-headed pincushion doll I made at a retreat two years ago, but she looks so much like me that it felt ... almost like voodoo to stick pins in me. Her. Ow! I have bangs, curly gray hair, silver wireframe glasses, and wear shoes like that with no socks for absolutely as long as I can, Spring, Summer, Fall. The round tubbiness is me also. *embarassed grin* I often wear jewel tones too, plum, rose, turquoise, forest green, etc. All she needs is a little siamese cat or two.

The book, Stack a New Deck, is my one quilt book for the year. I'm taking a class at our retreat this November, and have to have the book for that. I'm not one to precisely follow a pattern someone else has made, so I don't often buy books. This one's got some interesting ideas though. My main complaint so far, from just reading her instructions, is that she's a little wasteful of fabric, especially those expensive batiks! For instance, for one quilt, she has you cutting 64 squares 9½ inches in size, using 56 of them, then she says TRIM an inch and ½ off two sides of the remaining eight squares, to make them 8 inches square. Uggh. Not ME. :)

Friday, September 15, 2006

Mostly done!

Well, I took my machine in to the nearest repair place... and they said they'd puffed a few puffs of air thru the tension dial and it was fixed. But I insisted on test driving it there, and it did the same thing for me that it had been doing, after I'd sewn for a while. Then I let them keep it overnight, and this time he said he'd buffed down some little place and sewed a bunch with it, and it was working. And on the two pieces of that felty stuff they demo on, it had sewn ok.

At home, I set it up for free motion, and it was still breaking and snarling. Ann had suggested that I try regular sewing, and with the walking foot, and it does fine... it's just with free motion. The only things I see different are dropping the feed dogs, and using the free motion foot.


I was using 100% cotton gray DMC thread on the top and bottom for the freehand fans I was trying. I tried switching to a stronger cotton/poly red thread and made freehand loops in the inner red border, and still had problems. (You don't see it on the red, I was using red on top and bobbin.) So I took the darning foot off, and put the walking foot on, and kept the red thread, stitched in the ditch between the inner border and the piano keys, and two straight lines perpendicular to the keys, then again in the ditch between the keys and the last red border. Except for a few inches (where I'd been playing with the tension for the darning foot,) once I switched to 'normal' tension for the walking foot, it worked beautifully.

The walking foot is also working well for machine sewing the binding. :)


So I don't know WHAT the problem is with free motion quilting. The ability to do free motion quilting is the main reason I got this new machine a few months ago. If I wanted to piece, or quilt with a walking foot, I have my old Kenmore.

I've tried it with the machine set on slow... medium... and fast. I tried it with the top tension several places on the dial, from loose to tight. I still got breaks in the top thread and loops and snarls of the top thread on the bottom. I think I've picked out more thread this week than in my whole life. Any suggestions, anyone?

And THAT'S why I haven't been blogging... but I promise to get around to all your blogs this weekend!

Wednesday, September 06, 2006

Toby and the TV

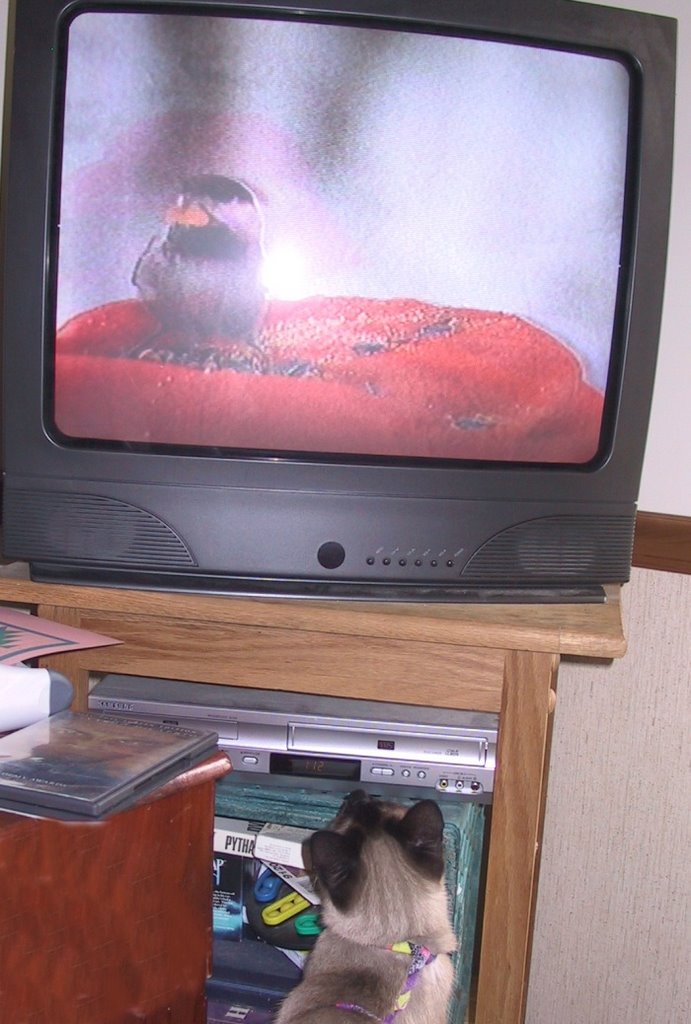
Time for a kitty post? I was watching a kids program on PBS this past long weekend, and found a nature show where they built a snowman and watched the animals come to feed in the snow. Here's Toby (who doesn't go outside, and would probably freak out if a fly landed on him) practicing being the great Siamese Hunter. First the cardinals and sparrows caught his eye, eating seed out of the snowman's cap:


Then they showed a hedgehog, there to eat the raisins they'd used for the snowman's eyes, I think. Toby just couldn't stand that little face, paws, and quivering nose on the screen. If it'd been a real hedgehog, he'd have a paw full of prickles:


Finally a herd of deer came to eat the carrots - one nibbled the nose off the snowman, and others ate carrots that were spelling words in the snow.


There were some other cute pix too, esp. the snowshoe rabbit and various other birds flying around, but I thought I'd better limit myself to 3 for the sake of all those quilters who aren't cat people... :) I'd never seen him paying this much attention to TV before. He watched almost the entire hour long show, standing on his hind legs, trying to bat at the things on the screen.


On the quilting front, I'm trying to do some free motion machine fans on the plaid quilt - but my top thread keeps snapping. I think it snags somehow as it goes thru the tension dial. I've tried less tension... and more tension... and even cleaned out the bobbin case thingy, getting more lint than I would have expected from a fairly new machine! Any suggestions? I'm using 100% cotton thread, top and bottom.

Monday, September 04, 2006

Plaid Top Done

Well, I think this is the quickest little quilt top I've ever made. It finished at 40 x 52, which is a good size for a wheelchair lap quilt.

A big thanks will have to go out to Finn (who we all know and love, but I'll give the link to her blog anyway.) We were chatting on MSN this morning, and she suggested the piano key border instead of the nine patch or 4 patch. She'll have to consider herself the virtual gramma for this quilt. :) Thanks, Finn! It worked!
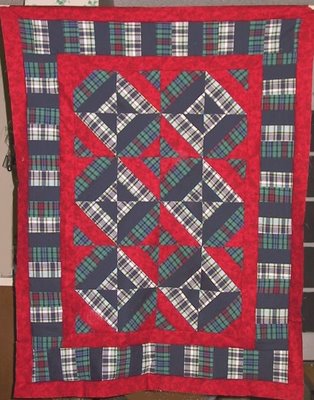


Of course, Bonnie would have to be the other relative to claim this quilt-child - the original inspiration for the 6 center blocks came from her site, the Hidden Spools pattern. I chose a bigger strip size to start with, so my blocks finished a little larger.

I think the original border I'd thought of, with 9 or 4 patch blocks would have been too busy. The piano keys, without the red fabric, worked better.

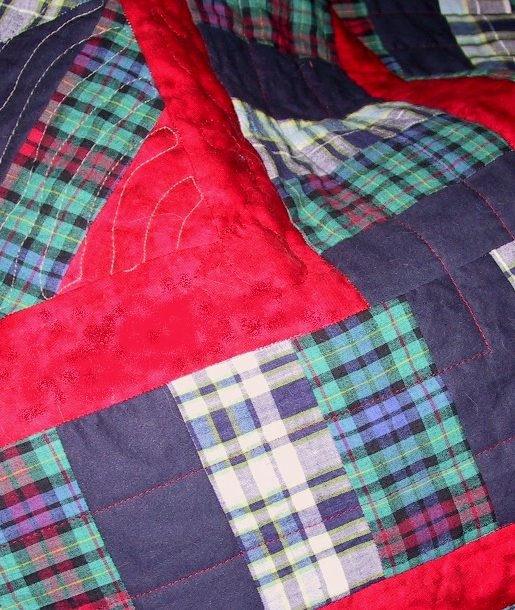
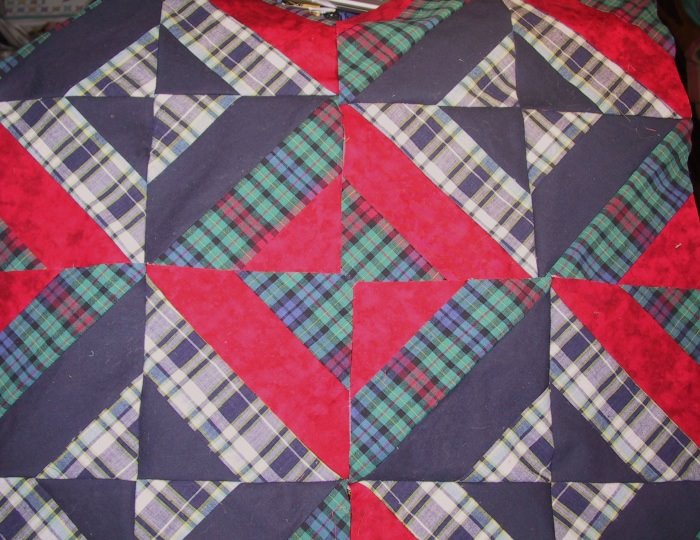
Since I was trying for a guy type quilt, I've only used four fabrics in this, navy&white plaid, navy; green&red plaid, red; but it doesn't look like a 4 fabric quilt, does it? This picture is probably closer to the correct colors, the red is from a line called 'quilt blenders' and has a lot of darker red blotches on it.

What I've Learned from my First Plaid Quilt:

1. Look for a better plaid fabric before using it on the bias like the center 6 blocks were. This was a loose weave and very stretchy. The red was a quilting fabric and handled the bias much better.

2. Plaids were easy to cut on the straight of grain. This whole quilt top was done with 2½ inch strips. I made sure to start cutting each length of fabric straight, and was easily able to check that nothing shifted.

3. A smaller strip would not have worked as well with a plaid this big. I'll have to remember that the size of the plaid dictates the size of the strips.

4. A little plaid goes a long way! Visually, I guess I should think of it the same way I would a large to medium floral.

Now I have enough plaid to back this one with - I will try to quilt this one on my machine tomorrow instead of sending it off to be done. THEN I have some 'girly' color plaids, with lavender and teals... hot pinks and oranges. That can be my next project. :)

Saturday, September 02, 2006

Red Borders

Well, ok, it's growing on me. The flash is making the red brighter, it's not nearly so loud in person. I made two more of these stretchy blocks so I could make a 2x3 center for this lap quilt. Then added a red border:


Now I'll do a 4 patch or 9-patch kinda border, whatever fits better, using more of the plaids and blue, but no red... and a couple more borders and I'll be done with the top. I think. lol

Friday, September 01, 2006

Another Web Page

Here's the second round to my guild's version of the Round Ostrich. Anyone want to help me proofread it or offer ideas?

Link to September Rounds B & C

If anyone has any good ideas for rounds D & E I'll take suggestions too!

I've also been working on making some blocks from that plaid material I got back when my local Hancock's was going out of business. I'm using a pattern from Bonnie's site, called Hidden Spools, but I'm not as happy with it as I thought I would be.


This is my first 4 blocks, not sewn together yet, which is why the plaid in the middle looks funny. :) Bonnie warned that there would be all bias edges - but on this loosely woven plaid fabric, there's a LOT of stretch.

I can't decide if I need to go on and put some straight-of-grain sashing in now, or sew these 4 together THEN put a border around it. It'll be a wheelchair quilt for my guild's charity challenge, so there's no exact size requirement I'm going for.

The red was supposed to cheer it up some, when I put the blue and plaids together, it looked too dreary... there IS another plaid with a lot more red that I plan to use for this one too. If I put sashing between these 4 blocks, I could use that to help blend in that red. But if I sash the blocks, I'll lose that red spool in the center. Any hints, anyone?

Sunday, August 27, 2006

Fishy Art Quilt

Well, I've decided I'm not really an 'art quilter' and I've told them I'm going to stop coming to the Art bee meetings. Instead, I think I'm going to join the Stashbuster's bee they're about to start... I hope they pick an evening for meetings that will work with my schedule.

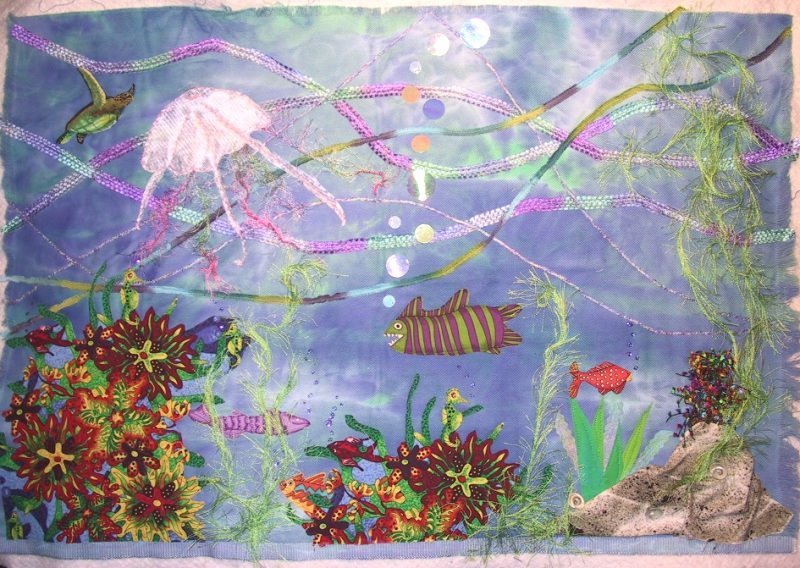
Anyway, there's the last of our three art quilts we've been passing around:


Since I'm not coming back, this one's my own blue fabric, the dyed denim on the bottom, and two other people have had it the last two months, adding the fish, corals, bubbles, and seaweed. The detail is incredible, I especially love the rock in the lower right corner and the fish with the teeth!

I'm not sure where it should go from here. Other than adding some trapunto to the fish shapes (and that'd be a challenge to do with the denim, I think) the only other things I can think of to do would be add some sand colored fabric to the bottom - and tie on some more shells? Add more beads for eyes and such?

Have any of you ever made a 3D fabric frame, with that stiff interfacing they use for fabric bowls? I think the difficult part would be the corners. Any ideas?

Friday, August 25, 2006

Silly Task to make you Smile

Ok, I know it's silly... :) Got this in an e-mail while I was taking a break from quilting.

Try to use your mouse pointer to trace the moustache on the guy that appears. Can you do it?

Link to Smooth my Moustache

I Think some programmer somewhere has too much time... lol

Monday, August 21, 2006

First Round Done

Wheeee!
My first Ostrich round is done, and it isn't even close to the deadline. :)

I may have to make this King size, so I can use it myself... lol The center star block was 12 inches, the aqua border 2 inches, so by the time I added the 4 inch logs on each side, I'm up to 24 inches square.


And of course, now I'm impatient for October, so I can learn the theme for the next round.

Saturday, August 19, 2006

Playing with Pineapple Blossoms

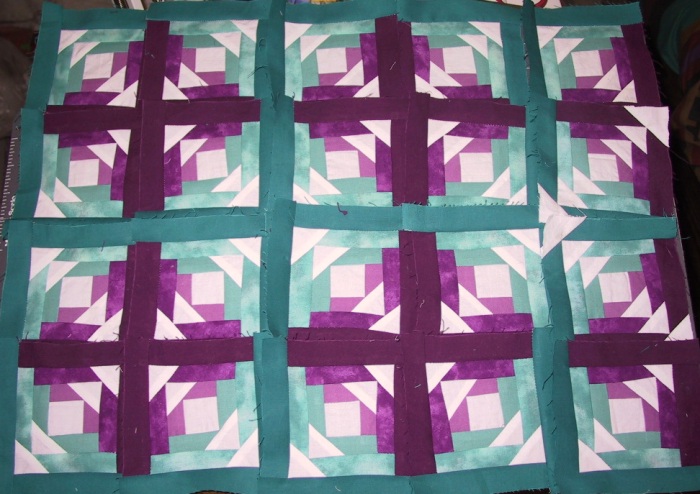
Well, this is not how I'm going to use these, they'll be in a border, not all together, but I couldn't resist playing with the patterns they make. Maybe someday I'll make a quilt with this block ... but the blocks will sure be bigger than 4 inches square!

Straight Furrows

Grid of Diamonds

Pinwheel Center

Purple Center

Teal Center

I would have a difficult time deciding on one pattern though! Which one of these do YOU like the best? Here's one I made last Feb. with hot pink, light pink, and purple triangles in the diagonal. I made some solid squares without the triangle corners to complete my heart - and the use of solid squares opens up a whole 'nother realm of patterns. :)

Thursday, August 17, 2006

Pineapple Blossom Blocks

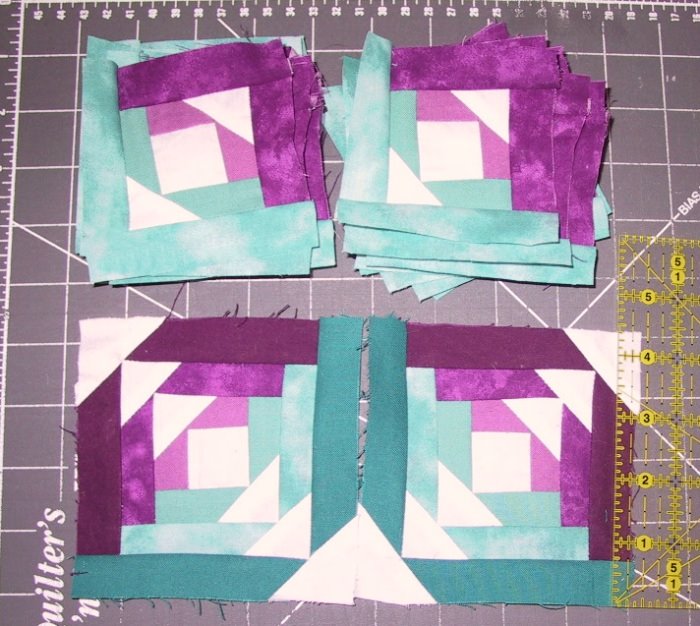
Here's what I've been working on these last few days. They're going to be round two of the Ostrich challenge. (Well, if you count the center block as a round, if not, they're round one.) We're not supposed to tell anyone the theme, but these will fit it. :) I did obviously decide to add in the teal fabric to the purple, these will go around the purple toned star block you saw a couple of posts ago.


I'm making 20 of them. The bottom two are my two sample blocks, above that is two stacks of nine partial blocks awaiting ironing. After work each night, I'm trying to do a pair of white triangle corners and a round of logs. You might recognize the block from Quiltville, it's Bonnie's Pineapple Blossom block, but I've redrawn it in EQ and made it teeny, to finish at 4 inches.

I also tried the block with teal on one side of the triangles, purples on the other, but in EQ, the border they'll be on didn't look as good as when I put the white diagonal where it is now. You'll see when I get them all sewn together!

Sunday, August 13, 2006

Art Quilt Bee time again

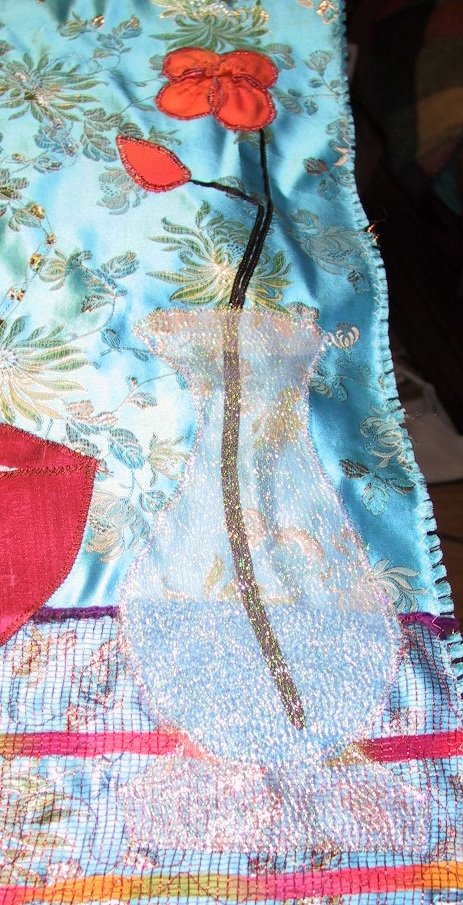
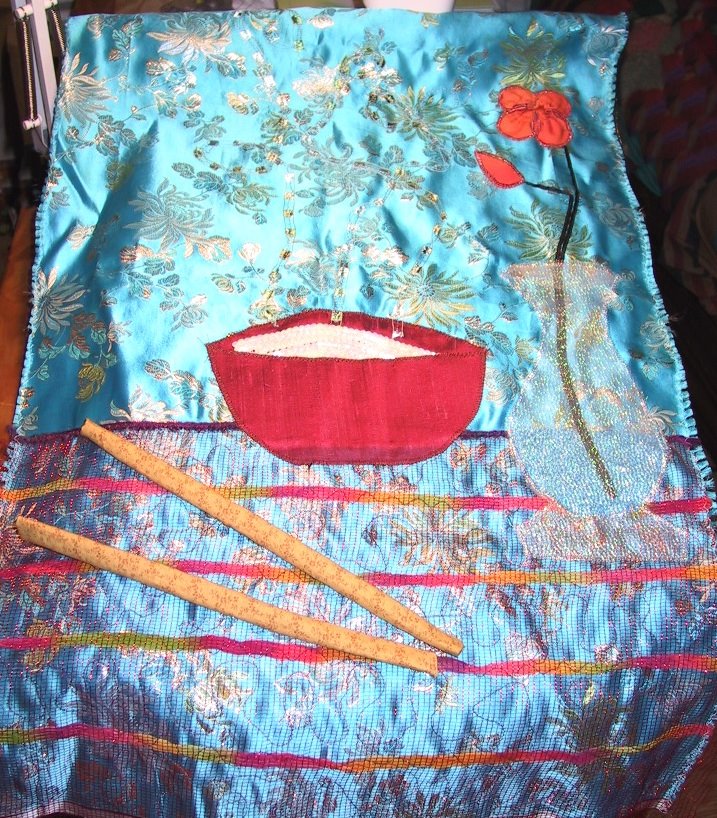
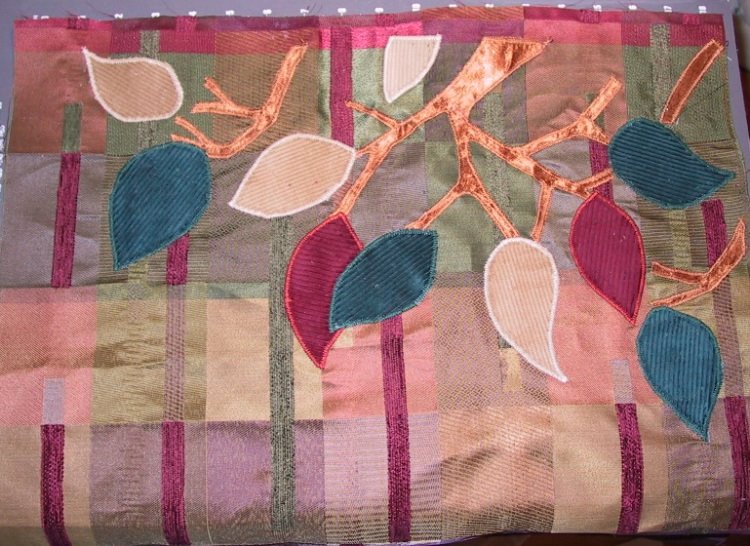
Well, it's been a month since I attended my Art Quilt Bee! This weekend, I've been working on the new piece of fabric I got. Last month, you may remember, I had a plaid fabric in Autumn colors, so I added a branch and corduroy fall leaves to it. This month, I traded for a turquoise satiny piece with a distinctly oriental feel. The member who got it first had added a deep red rice bowl with sequin rice (and if you look close, steam rising from it), and she also put a net table for the bowl to sit on.

Today, I added the vase on the right, with an orange bud and flower on a black stem. I was trying to make it look like a crystal vase, not sure if I succeeded or not!


I also made a pair of chopsticks, but I havent tacked them on yet. I can't decide if I like them there or not.


Also, there's at least another round with this fabric... I'll take it to them and we'll all trade again. I want to leave room for the third person who gets this piece to do something with it... so if they wanted to put a plate of egg rolls or... _?_ ... on the table under the rice bowl, there'd be space. Guess I'll take the chopsticks to the meeting unattached and just pass them with the fabric.

I'm really looking forward to seeing what was done with the blue-to-green dyed fabric I took... AND the plaid fabric I worked on last month. Wonder what they added under the leaves?

Tuesday, August 08, 2006

Purple Star Center

Here's the center block for my Ostrich. I've decided to join the crowd of bloggers that's doing the one that Kim from Peach Quilting is offering. :)


I like the timetable she's set up - a nice slow project that won't have me rushing to meet the deadlines. I hope. :)

Not sure if I want to make this a two color quilt (well, deep purple, light purple, splotchy purple AND white) ... or add teal in there. I have the same 3 fabric choices in a bluey-green, deep teal, lighter aqua, and splotchy. I'll have to see what her next round is!

If you think you're interested, it's still not too late to join in, the center block's not due till the 15th.

Sunday, August 06, 2006

Toby's expression

I think what Toby's really thinking is not, MY quilt... but... is she going to make me get down just when I've found a soft place to nap?


and 'Maybe if I don't look at her, she won't see me and make me move.'

People always say cats don't show much expression, but I'm always attributing feelings and words to my two. :D

Toby on Corner

Wow, thanks for all the kind comments!

The quilt really isn't as big as that picture made it look, here's a picture of Toby laying next to another of my corner jogs, for scale.


You get the impression of size, I think, because there's so many of the little nine patch blocks - but they're only 6 inches square. The quilter's eye is fooled because you want to make the blocks 12 inches square, which really WOULD make this a huge top. As it is, it's 96 x 120, which is what I computed for a queen size spread with a pillow tuck at the top.

And Borders

Well, here's the quilt with borders. I just finished it this evening. :P


Supposed to be queen sized, but I think it's queen sized spread... lol. The border didn't use all my bonus hsts from making all the snowballs, so I have a bunch of them left. Maybe I'll make matching pillow shams or something.


I had a problem getting the borders to come out right at the corners... so I just decided to make every corner different. The border connects all the way around, makes a path... but at the corners, it makes some quirky little jogs.

Tuesday, August 01, 2006

Another Ostrich

Well, I've decided to adapt an idea I first saw on Anne's blog for my guild. I've never done anything like this before, so I'd welcome some help!

If anyone has time to skim what I've got up on my webpage for my Ostrich version for my quilt guild, I'd appreciate it. I'll run it as a block of the month. Some of the members aren't real thrilled with spending a lot of time making a complex block, then only having a small chance of winning the drawing for all the blocks, so they'll do only easy things like 9-patch swaps or friendship stars. The more experienced members don't want to make simplistic blocks. With a huge variation of skill levels in the guild (from Houston and Paducah award winners to people who literally can't make a flat nine patch with corners matching) it's a challenge for the block of the month person to get participation! Anyway, here's the page:

Round Ostrich

Am I spelling it out too much? Giving too many examples? I'm thinking I need rounds that could be simple OR complex, depending on the individual's skill level. Feedback welcome! Is there anything on the page that confuses you or anything that would confuse you if you were a beginning quilter? Any changes you'd make?

I've decided to also join the Ostrich being offered at Peachquilting that starts August 15th - I like the expanded time frame she offers. Having the rounds due two months apart should give me lots of time to work!

Sunday, July 30, 2006

One Word Meme

Well, I decided that I just plain didn't want to answer some of them... So my list of one word answers to these questions is shorter by seven. You can make what you want of the ones I left out. :)

One Word for -
1. Yourself: creative
2. Your partner: divorced
3. Your hair: gray
4. Your favorite item: computer
5. Your favorite drink: diet coke
6. Your dream home: castle
7. The room you are in: den
8. Your pleasure: quilting
9. Your fear: pain
10. Where you want to be in ten years: here
11. Who you hung out with last night: cats
12. What you're not: skinny
13. One of your wish list items: longarm
14. The last thing you did: sew
15. What you are wearing: clothes
16. Your favorite weather: Fall
17. Your favorite book: Ender's Game
18. Last thing you ate: salad
19. Your life: quiet
20. Your mood: good

Besides, 20 is such a nice round number for questions.

Saturday, July 29, 2006

Center done

Quilt Center
Well, here's the center of my quilt... now for the borders! Just as I predicted, it's too long to hang on the fence now. :) I took it to work and used the tall library shelving units to hang it for a quick picture - really speedy, I just lifted up a book on that top shelf every foot or so, and pinched the top edge of the quilt under it. I've been working on the borders, but I'm at the cutting strips to go with all my hsts stage and it's nothing interesting to take a picture of yet. This IS the first large quilt I've done - larger than twin size, I mean. I've been surprised at what a mass of fabric it is to move around!


Here's Libby, looking at the birds in my front yard. I know I'm weird, but I love the way she curls her tail around her toes so neatly. I wanted to try to move her tail around to the right side of her body, so she'd look prettier, but figured I'd take a picture of her before I tried it. Lucky I did, as soon as I tried to pose her, she got disgusted with me and decided window-sitting-with-interfering-mom wasn't a good place to be. :D

Chickweed Lane is my favorite comic strip. :) Mostly because it features Solange, the Siamese cat - the artist has the quirks and mannerisms of the Siamese down to a T. Chickweed Lane Index

Tuesday, July 25, 2006

Parking challenge

Ok, I know it's not quilty, but here's a challenge for you to try:

Click Here to Drive

I'm not doing too well with it - better be glad you're not parked next to me! :D

Saturday, July 22, 2006

Almost done.

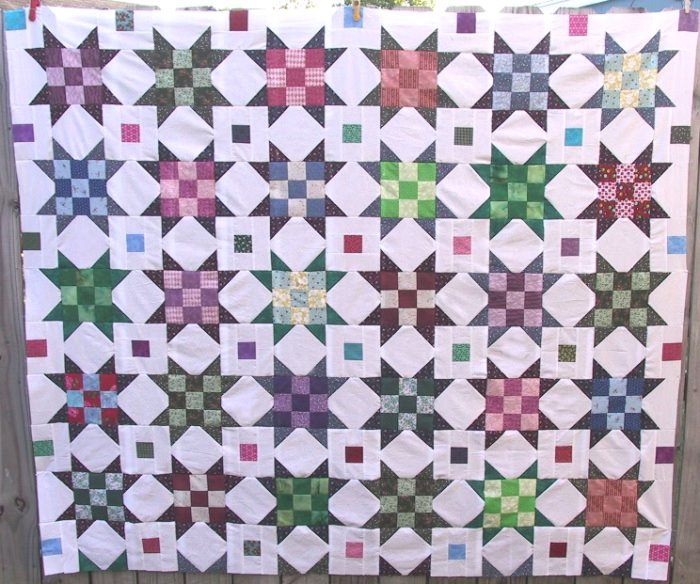
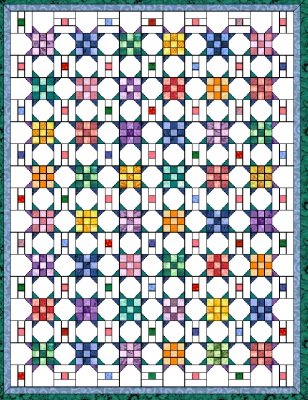
Well, I'm still not finished, but hey, it's only Saturday. :) I've got three more rows of 6 stars to go. Here it is at the 6 blocks by 5 blocks stage - I went on and took a picture of it now, because soon it'll be too long to fit on the fence without hanging on the grass.


And still playing in Corel, I decided to see what it'd look like if I had set the blocks on point. I rotated the picture 45° then cropped it to make it square again:


Interesting look that way! It would have meant a lot of white triangles around the edge, though. I think I like the straight set better. Easier too.

This whole quilt was pretty easy, doing it in snowballs, nine-patches, and cobblestones. I was trying to give the impression of white sashing around the stars, with colored cornerstones. Back up far enough from your monitor and you can see I could have made the stars as one block, then added sashing and come up with the same design.


I'll put a 2½ inch border of white all the way around this, so the edge color squares float like the middle ones do. Then I have a LOT of little bonus hsts, in the point fabric for the stars, all high contrast dark calicos against white. In EQ, I've only had long one-fabric strips for borders on this - haven't even started trying to replace a border with something using the little triangles! A line of little sawtooth points would be easiest, but I've done that before, and would like to try a new pattern using them. Any suggestions?

Thursday, July 20, 2006

Jelly Bean

Thanks, Hanne!
This one was quick. :)

You Are a Caramel Apple Jelly Bean

You have a gentle sophistication. An appreciation of fine things, without being snobby about it. You enjoy sweet tastes and silky textures.

Wednesday, July 19, 2006

Art from Snowballs, 9-Patches and Cobblestones

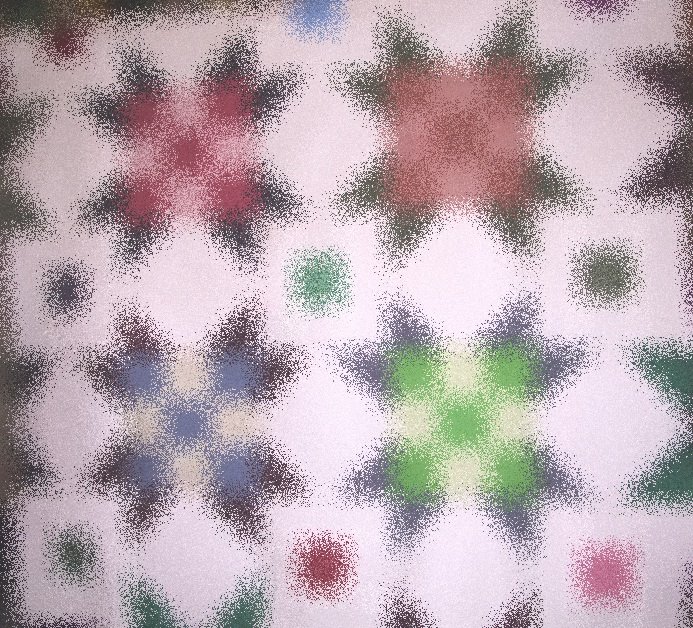
Well, I have been sewing on all my little 6½ square blocks. But I don't want to show you a picture till I'm farther along. :) So, here is the little set of squares I sewed as a test, BUT *evil grin* I've put it in Corel and squinched at the photograph, so you can only get a general idea of what I'm doing.

This first version (all three pix started with the same photograph) is what they call an 'impressionist dabbled paint effect:


The one below is what the quilt would look like if I dipped it in white paint or a discharge dye, and let it drip:


And the last is what Corel calls a 'swirled paint effect' but instead, looks to me like something you're seeing through a rainy window pane:


The quilt is actually going to be queen sized - six 9-patch star blocks across and eight blocks down, plus borders. Because I want the star points to match around the 9-patches, I had to stop making snowball blocks and start connecting, so I'd be able to make sure I have the right combinations of snowball corners I need. I'm hoping to get a lot more done this weekend! Right now, I'm at 4 blocks over and 5 down.

Monday, July 17, 2006

Leaf Art

I've joined an Art Quilt group, here in Memphis, to try to expand my quilting horizons and stretch my limits a bit. I don't consider myself an art quilter by any means, but I figure it can't hurt to give some of the techniques a try, get out of my comfort level. We're almost all beginners at this, muddling along.

We each brought a piece of fabric to our last meeting - only stipulation was that it could NOT be 100% cotton quilting fabric. Then we traded pieces in a drawing, and also traded some embellishments.


The piece I drew looked like autumn to me - so I added some satin branches and corduroy leaves along the top edge. This picture (at least on my monitor) looks a lot more pinkish than it really is - the two red leaves are actually a deep burgundy. There's another 6 to 8 inches that drapes off the table on the bottom - plenty of room for someone else to add something more! Today I'll take this to our meeting and trade for another piece of fabric. I still don't feel like an art quilter - this is just machine applique. Maybe if I'd done something abstract and non-representational, it'd feel more arty? I guess I need to decide what my definition of an art quilter is. Any suggestions?

Friday, July 14, 2006

More Blocks

Well, working full time gives me only an hour or so each evening to quilt, so this may be a long, drawn out riddle. *evil grin*

Here's the progress so far:

Yes, I know it looks a lot like the last picture, but this time there's

52 snowballs with 4 dark scrappy corners
50 scrappy nine-patches
8 half cobblestones (rectangular, for the edges, lots more to come)
30 square cobblestones (and a lot of strips cut but not sewn yet)
AND more than 230 bonus triangles in the baggie, and stacked on the lower right corner, from the snowballs.

I'm kinda procrastinating on ironing all those triangles, yes, they WILL be for the border, (you guys are so smart)and I still don't know if I'm just going to make a row of hst's or maybe something windmill-y with them. I'll decide when I get the final count.

I've staggered the half cobblestone stack, so I can see what fabrics I've used for them. I am just anal enough that I don't want to have a bunch of the same color in that outer edge, so as I sew the cobblestones, I'm trying to remember to put aside a variety of center fabrics for these skinnier blocks. Some of my scraps will let me strip piece a row of 4 or 6 centers between white strips, but there won't be too many repeats.

:)

Wednesday, July 12, 2006

A Riddle

Is anyone ready for a riddle?

What do you make when you have:
48 scrappy nine-patches,
33 snowballs with scrappy dark print corners, and
15 I dunno what name to give them, but I've been thinking of them as donuts,
(all 6½ inches square)

AND what seems like two hundred little bonus 2¼ inch half square triangles, some pressed and some not?


Well, you'll just have to check this space later for the answer! But except for the white background, it sure is eating into my scraps.

:)
Related Posts Plugin for WordPress, Blogger...