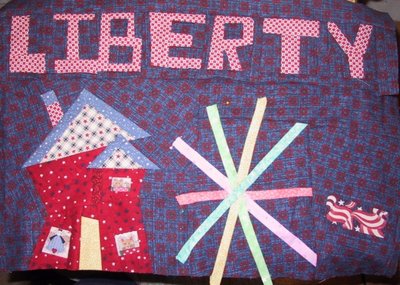
Well, here's where I am now - got my Liberty sewn to the house and spark. I tried several different fuses for the firecracker, and finally went and bought some single fold teeny bias tape in white. A straight fuse looked funny, so I'll hand stitch (uggh) down the new skinny bias fuse all curvy. I also decided to try and save some of the spark points, so when I trimmed the blue straight, I saved the bright bits, and I'll stitch them down too. I didn't want them all ending at the edge to the rectangle they're made on.
I took my first class with my new machine today - since anal obsessive me had already read the instruction book, I didn't learn much, but it WAS great to see her put all the different feet on and demo all the stitches for me. The letters are so cool, and I can see some great quilt labels using them!
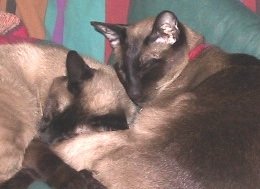
These are my two sleeping angels... don't they look innocent? Someday, I'd like to do a quilt where two sleeping Siamese cats, faces together, make a heart shape. I know, kinda sappy, aren't I?
Of course you know they're not really sleeping, they're plotting together, and it helps them share their devious brain waves when their whiskers are touching.
Wednesday, May 31, 2006
Sunday, May 28, 2006
House and Firecracker
Do you get tired of seeing this quilt block by block? :)
I think I'm a slow quilter when it comes to making things without a pattern, and of course, when I decided to make a little dormer window for my kitten, and a second story to the house, it took longer.
If I'd drawn it in EQ5, and printed up the paper piecing pattern, it'd have been faster and flatter too. It would have been more difficult to get exactly the little bits in the windows, I'd have had to pre measure the little squares. I got stuck when the dormer roof was too tall and I didn't want to cut the point off, till I got the idea to rip those seams open, pin the tip back, sew the long seam, then re-pin the dormer back on top of the eaves. I've still got to add a strip along the bottom and left sides before I connect it to the firecracker.
This hasn't even been trimmed yet - it's got a slight bubble up in the center and I wanted to see if pressing it flat would take the bubble out. It did, mostly! My problem was in slightly stretching the bias when putting in the angled colors. I also had trouble getting the strips to match across from each other! Even a slight jig made the strips look bendy.
I've just laid the blocks on that fabric to take the picture - they're not attached and won't be attached there. :) I wanted to iron it before I cut a FQ of it to take to guild meetings for our FQ drawing. There's a lot left over. I don't like taking pix of blocks directly on my ironing pad - I'm embarassed it's got yellowed spots!
Thursday, May 25, 2006
AND Justice
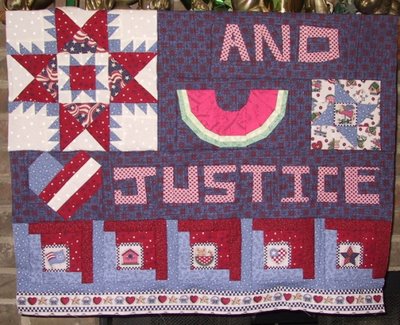
Well, after looking at the pictures of the bottom ¼ of the wallhanging (sometimes a picture takes you away from the details and makes you look at the whole) I decided that I didn't like the 4 log cabin blocks with the navy logs. There was too much space between them, and too much fill at either end. Also, because of the strong navy, the motifs had the illusion of looking staggered, when they weren't.
Instead, I ripped them off and made 5 new log cabin blocks to replace them with, and this time put the red on the top, right, and blue on the bottom, left instead of alternating it like last time. Makes all the motif insides look the same level, and I like it much better. :)
I didn't pick apart OR throw out the other 4 log cabin blocks. They're just the right size to fit across the quilt, so I'll use them on the back, as a reminder to myself that I prefer the logs in a little log cabin block to be very close in color/value!
Not sure if I'll leave the border fabric with hearts/baskets/stars along the bottom or not. There's enough to put a matching row along the top too, what do you think? Is it too busy? One row, two, or leave it off? Think it'll look different with a solid dark border next to it?
Now onward to making the wonky house and firecracker!
Wednesday, May 24, 2006
Progress
Well, here's the watermelon, AND the first two blocks I've made on my new machine. I really like the ¼ inch foot, it is so much easier than using a chunk of masking tape on the machine bed ... :) I also love being able to see thru the bobbin cover and know when I'm getting close to running out of bobbin thread.
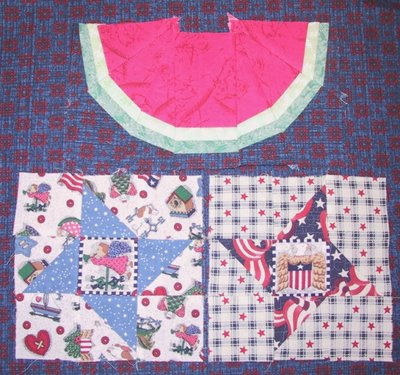
The watermelon has a weird middle right now, because I plan to turn it under, in a scoop shape, and make it look like there's a bite missing. I thought I had enough of the navy-with-red/white I used on the right side star points to use for a border, but I only had a FQ of it. I do have the dark red with teeny stars that I used on the first EQ layout, and 2 totally different patriotic fabrics I haven't used yet. I have a LOT of the two light fabrics I used on the star blocks, but I think I need to border this in something darker, don't you? What I don't use on the front, I plan to stitch together in big chunks, especially the more obvious patriotic prints, for the backing.
Here's where I am so far. Not too far off the layout I did in EQ, is it? I'd probably be faster on my old machine, I have to keep stopping and looking up things (like what the needle position should be for a perfect ¼ inch stitch and how much pressure to use against the feed dogs.) The instruction book is *gulp* 75 pages.
I collect brass cats. Nice for quilt holders across my mantel, aren't they? Normally I don't line them all up on the edge though. :)
On a different note, I'd like to thank Bonnie for her great website, and for her giving my guild permission to use the Strip Twist block and instruction pages for our guild's Block of the Month for May. At the guild meeting Tues. night, a LOT of people had nice things to say about her site, how they loved her scrap user's system, and all the creative ways of using the stash. We had a tremendous response for Block of the Month, lots of blocks made, and I think it was mainly because of the excellent instructions with pictures on Bonnie's site! THANKS, BONNIE!
I think I'll start sticking in a few gratitudes every now and then, mainly because I like reading other peoples gratitudes:
I'm grateful for a week and a half of vacation. I do love not having to set my alarm! No driving in traffic either!
I'm grateful for a good quilt guild to belong to. I love seeing everyone's things in our Sew and Tell, and even though we get bogged down in the business side of things sometimes, we also have fun.
I'm grateful that everyone liked the mandarin orange, pineapple, whipped cream, coconut and pecan ambrosia I took for guild potluck. I only brought home one largish spoonful in the bottom of the bowl, which is a definite improvement over last time, when there were so many desserts, I brought home half a pan of brownies that I DID NOT need to eat all by myself... :)
Tuesday, May 23, 2006
My new Janome
Well, I finally did it, after talking about it for months, I bought a new sewing machine. It's a Janome Memory Craft, 6500. My trusty old Kenmore still works, and I felt like such a materialistic consumer for even wanting a new one. But want it I did, and here it is:
Just ignore the tv you see at the top right over the machine, I like to watch 'King of the Hill' late at night. Yup, you can see Hank standing out by his trash can, beer in his hand. *grins* I must be a redneck too, I keep the piece of plywood on the table I sew on, to protect the table surface from scratches, inadvertent slips of the rotary cutter, heat from the iron, etc.
This machine DOES so much more than the 30+ year old one! I'll be able to free motion quilt now! And it has a thread cutter and separate bobbin motor and needle up/down and all kinds of feet and stitches and... :) Can you tell I'm excited and happy?
The only thing I've found that I don't like so far is that the acrylic table-expander that comes with it tends to go sliding off to the left. I looked online and read that someone had a simple solution for it, hook a rubberband around the extender leg, then stretch it to the sewing machine leg. Cheap, easy to remove when the table comes off, and low cost to replace.
I'm off work this week and part of next week, and I can hardly wait to play on it. The only thing I've done so far is attach all the loose parts they expect you to bolt on, fill a bobbin, thread it, and sew a couple of test seams. But tomorrow.... :)
Sunday, May 21, 2006
Second layout
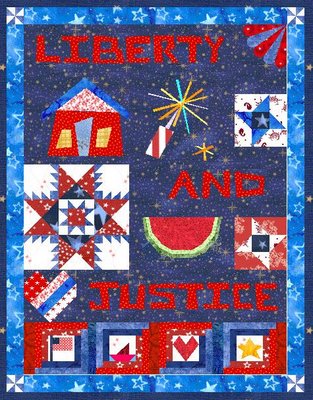
Ok, took out some of the blocks... this is only going to be 30 inches wide, maybe 40 or so long, so I think it WAS getting too busy. The house got changed to a wonky house instead of a traditional block, and I drafted a pieced watermelon instead of an appliqued one. I have some small 2-hole buttons I'll use for seeds. The little pinwheels above the house are now in the border corners.
I am thinking about using the navy with red and white swirly stripes (that I used in the center of the feathered star) for the border, but there's nothing close to that fabric it in EQ's files. Then I'll bind it in something dark.
The two little friendship stars on the right will have vastly different fabric too, since I'm trying to use up more of this patriotic stuff I won. I may put some little faces looking out the house windows. :) But now, is the house too big? hmm.
Saturday, May 20, 2006
Patriotic Design Play
Here's my first attempt at a layout for the patriotic blocks I'm making. The only ones that are done so far are the words LIBERTY AND JUSTICE, the feathered star, and the 4 log cabin with motif blocks along the bottom. The sizes of the rest of them are not set in stone yet, although I do have all the little triangles done for the pinwheel fireworks next to the house, they don't have to be pinwheels... they could be any design that uses hsts. I was also thinking about echoing the center of the feathered star - using some of the pinwheels for that instead.
Any feedback? Is there too much going on in there already? Should I eliminate some blocks and use more solid background chunks? Shrink the watermelon?
Friday, May 19, 2006
Feathered Star
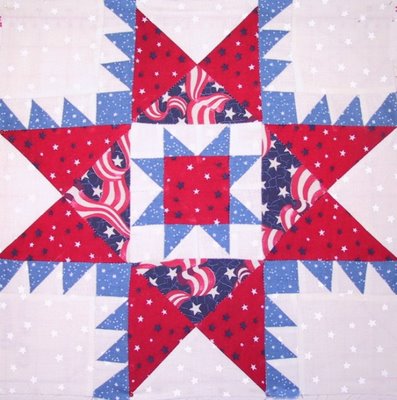
Finally finished my red, white, and blue feathered star for the patriotic quilt. :) Compared to all these folks who seem to be doing a new quilt top every week, I'm so slow! Maybe when I retire, I'll have time to do more... but then, I probably won't be able to afford fabric. Is that an excuse to go out and buy now?
I'm seriously looking at sewing machines, new ones. Right now, I'm researching the big names, Bernina, Pfaff, Janome. At first, I was considering one that I saw online that was the machine, quilting frame, and a choice of either a speed control OR a stitch regulator. The price was right and everything, but... then I found out that the machine only stitches straight. My current machine won't do a blanket stitch that I like for applique, so I was kinda thinking I might get one that had more stitches.
Anyone have a version of one of those three that they really like?
Opinions welcome and especially pros and cons too!
Thursday, May 18, 2006
HST's
Funny story today at work. :)
I'm making 32 half square triangles that will finish at one inch, for a feathered star type block I'm making for my patriotic quilt.
I love the look of the feathered star block, but doubt I'd have the patience to make a whole quilt of nothing but feathered stars. One block ought to be doable though! I drew up the block in EQ, then made my own hst paper the exact size I needed, using Corel, 16 little blocks per page, and printed it up. No little arrows or directions needed, I just stitch on the dotted and cut on the solid lines.
Last night I stitched my blue and white fabric to it, then took it to work this morning. Cutting the grid into triangles, trimming the dog ears, and ripping the paper off is a GREAT project to do during my 15 minute breaks, or at lunch. Portable, (everything fits into a ziplock baggie) not messy, and you get a lot done in 15 minutes.
One of the library customers saw the uncut grid on my desk, with fabric attached, and asked what I was making. I showed her the two pieces of fabric sewn to the back, and explained that I was doing a quilt block... I was told MOST emphatically that "It won't work that way, honey. That's not the way you make a quilt!"
She'd thought I planned to use the fabric, with the stitching lines on it just like that, uncut. :) Looking at the grid above, it DOES kind of look like a quilt block, doesn't it?
I folded back a corner and tried to show her how it'd work, but I don't think she 'got' it. She remembers hand piecing from when she was a little girl, but hasn't made a coverlet (as she called them) in more than 50 years. We didn't have much chance to talk, I found the book she wanted, and she left with her ride ... but now I'm thinking of all the things I wish I'd asked her. Wonder if she still has the coverlet she made?
Monday, May 15, 2006
Justice is Done
Ok, sorry, couldn't resist the title... :)
Here's JUSTICE with the ice added. I think people got the idea that they were already attached together because I took that picture of them on the same background as the back of the letters, but they're not.
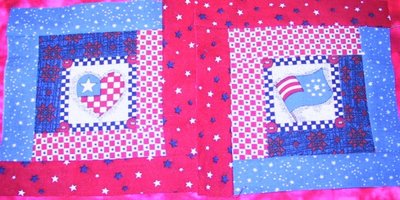
I have two fabrics with different patriotic motifs on them, the next 4 blocks are from the fabric with smaller designs - these made up into 6 inch squares.
Above are my two favorite ones, a little star, and the cat in the watermelon. :) Not sure if I'll add another round of logs to these or not, depends on where in the quilt they end up. There's also a few more designs in this fabric that I haven't used yet, two angels, a horse, an eagle, a shield and star thing.
Saturday, May 13, 2006
Liberty Letters
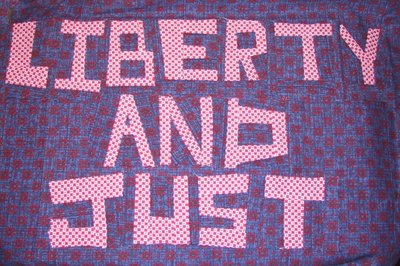
Here ya go, Tonya! Liberty and Just(ice)and maybe (for all) added later. :) I know my checkerboard red and white fabric on navy blue won't look anything like your usual fabric choices, but the spirit of the letters is still there!
I'd been wanting to try these letters for a while, and I was the lucky winner of a whole bunch of patriotic prints, half yards, at a guild event two years ago. Sooo, I'm putting them together in a patriotic ... either quilt or wall hanging.
Not sure if there will be other words on the quilt, but definitely some stars and fireworks and watermelon and whatever else red/white/and blue I can think of. Some of the fabric has fairly large motifs, that might look good in the kind of friendship stars that Finn's doing right now.
What else can you think of that would fit the theme? Suggestions welcome!
Thursday, May 11, 2006
The Borders revisited
A couple of people have asked me if I did end up trimming my blocks before adding borders - no, I didn't. I'd decided to just wing it. :)
And of course, when I tried to have the 2½ block inset border come out even at the corners, I had problems. What I ended up doing was pinning it on, seeing how much too long it was to come out even, unpinning it, taking an extra-wide seam in two or three places, repinning it, then sewing the final seam. Then it was easy enough to just do the same thing on the other side.
I did want the quilt just a little bit wider (can you tell I'd added an extra row of strip twist block quarters along the bottom?) That made it plenty long, but I chose to sneak in wider side borders and narrower end borders.
I don't think you can tell which of my 2½ square blocks are really not square, unless you really start looking at them with a critical eye. Or can you? :)
Sunday, May 07, 2006
Borders Finished. :)
Well, here's the strip twist quilt, with borders! Since the quilt has no pinks, and not many pastels, except a couple of yellows and a blue, I decided this was going to eventually be for a brother or nephew. I picked a darkish olive green tone, with little teeny stars, to border it with. This was one of the fabrics I got from the Hancock's going out of business sale on Friday. It was nice to have a choice of several border fabrics to choose from!
I thought at first glance that there was some kind of weird fade pattern to the fabric, till I looked harder and saw that it was the strong backlight from the setting sun that put the vertical stripes on the border... lol
Libby puts her shed-of-approval on it too. :)
Friday, May 05, 2006
Bad Jane, Bad
I've been SUCH a bad girl. :p
I was putting the newspapers on the sticks (our library hangs the daily newspapers on a rack) when I saw a large ad stating that my neighborhood Hancock's store, less than 5 miles from my house, is going out of business. EEEK! Everything in the store is at least 20% off, up to 40% off.
*gulp*
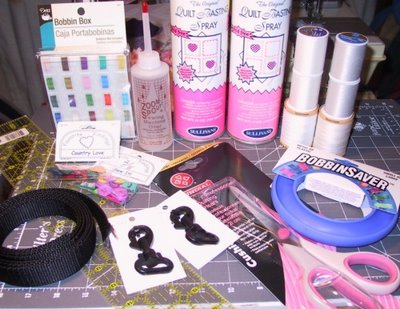
Did I resist temptation? Nooooooo. The damage was slightly over $120 for a LOT of fabric, and a tad over $50 for the notions you see in the pic:
I really DID need the new scissors, and had been wanting some with the cushy padded handles. I'll definitely use the 2 cans of basting spray and the sewing machine oil. The two big spools of thread are 800 meters each, the other four, 274 meters. I've been losing bobbins to Toby Monkeypaws, who fishes them out of my old bobbin box, (the cover was broken) then drops them on the floor, and swats them around. I'm hoping the new blue bobbin ring will be too difficult for my bobbin thief! The rest of my bobbins, the colors I don't normally use for quilting, will go in my new smaller bobbin box, with lid! The buttons were 40% off, and I'm very proud of limiting myself to only two packs. I'd been wanting an omnigrid that size for a while.
*confesses*
I also got just over 37 yards of material, all at least 20% off, some more. There was a two yard minimum, for fabric cut from the bolt. There's plain muslin, white on white and some other tone-on-tones, some Amish solids, and NO FQ, which will greatly expand my selections for borders and backings and background.
I was feeling REALLY quilty-guilty till I told myself that it averaged out to $3.25 per yard. Some people would spend that much on concert tickets for our big Memphis in May celebrations. This is just MY kind of entertainment... lol
And looking back at this post, I can rationalize my purchases pretty well, can't I? :)
Thursday, May 04, 2006
Laying Out Again
Well, here's what I did on my break at the library this afternoon. All the kids were asking, "Ms Jane, are you making a blanket?" So I did a little quilty education too, lol.
This has been a fun one to make, though, and quick! When I was cutting my strip sets, I got a 2½ row of blocks from each set, and I'd like to use those in the border, somehow. I've got some maroon/wine for the first, inner border, and then the blocky border, then another, thicker border in either the dark red or a blue, I guess.
Twist layout
*giggles*
Twist layout sounds like a gymnastic move, doesn't it?
I don't have a design wall, just a card table with a piece of plywood on it to make it larger - so I usually take my blocks to work, at the library, and shove two large library tables together to layout my quilts. I've found I can go in early and get a lot done before the library opens to the public. :)
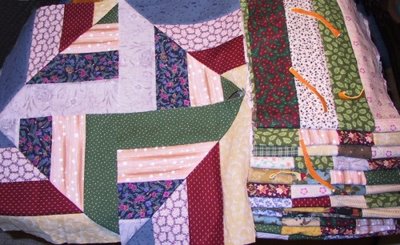
But tonight, after getting all my quarter blocks sewn, I couldn't resist laying some of them out to see what they look like. (Yes, Ann, to me it's still Wednesday night, not Thursday, lol) I think I was picking the top fabrics off each stack, so you don't see some of the variety of the fabrics I've used. I actually went through and grabbed all the FQ I didn't like, and divided them into lights and darks. All of these greens were too olive toned to go in the blue/teal/forest Delectable Mountain quilt I did. All the yellows too mustardy, etc. But all together, I like these!
My only question, for any of you that have done this one... I cut 8½ inch squares, then cut them on the diagonal to make the triangles, right? Then sewed them ... now these blocks are about 8¼ square. Should I trim them to 8 inches now? or sew the quarters together and trim the whole block to ... eww, what? Anyone?
Monday, May 01, 2006
Strip sets and Orange peels
Here's what I've been working on this weekend. No, I haven't finished my ribbon star blocks, but this one was just calling me... :) It's from Bonnie's site, Quiltville, and it's called Strip Twist.
In my sample block, on the left, you'll see why Bonnie suggests making all your block quarters before sewing a block together - in this layout, with 4 quarters made from the same strips, your eye is drawn away from the 'diamond inside a square' optical effect and toward the matching fabrics in each quarter, especially the lopsided look in the center.
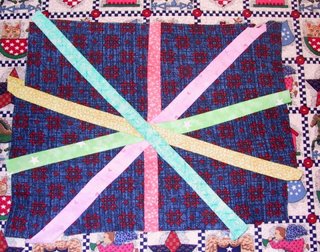
All the strip sets are on the left, waiting to be ironed, and just for Tonya... I've decorated them with my version of cat repellant, strips of dried orange peel.
This block is going to be our guild's BOM for the month of May. I'm being lazy and picking one from her site instead of making my own page with instructions. :D Quiltville's already got a link from my guild's site, and I'll just point them there for the BOM.