Tuesday, October 31, 2006

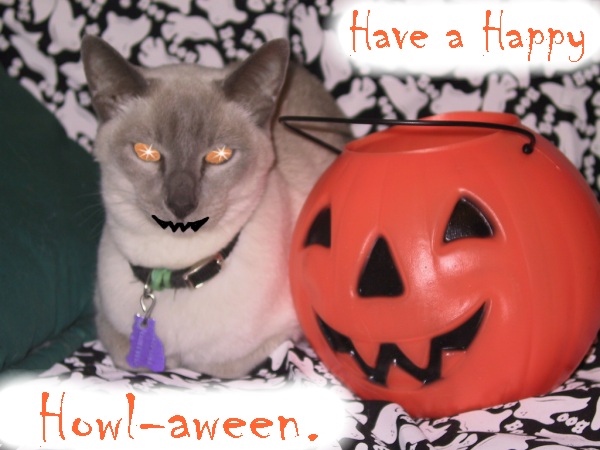
Happy Halloween!

Been trying to post these since I got home, but guess blogger was having a lot of graphic traffic. Better late than never!


Sunday, October 29, 2006

Halloween Decorations

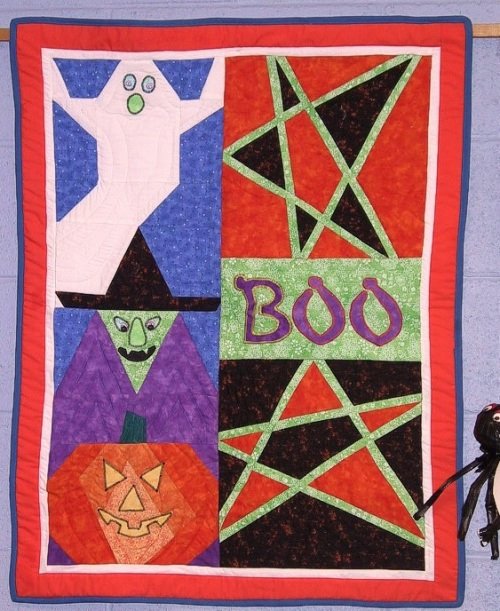
Full speed ahead for Halloween! We're all decorated at the library. I don't think I've shown this on my blog, but here's a little wall hanging I did last year. Don't be scared by the spidey hanging on the right side!


I saw the instructions for the stars in a magazine, one of those stack and slice techniques where you do two blocks at a time and switch the colors. The witch, pumpkin and ghost were all drawn in EQ5 and paper pieced, with applique bits added.

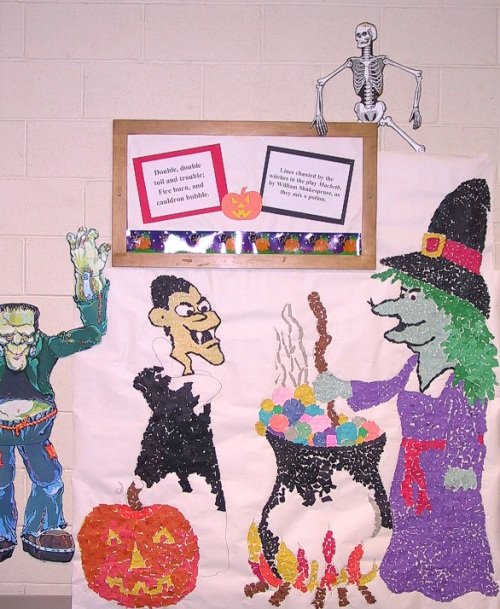
I've also been doing activities at the library with the neighborhood kids. This year I drew a large outline picture on paper with black crayon, and after school, they've been tearing small bits of construction paper and filling in the outlines. I've had all ages working on it, from the 4 year olds that come to my storytime (one bit at a time, with adults smearing the glue) to teenagers, doing the detail trim like the black outlines.


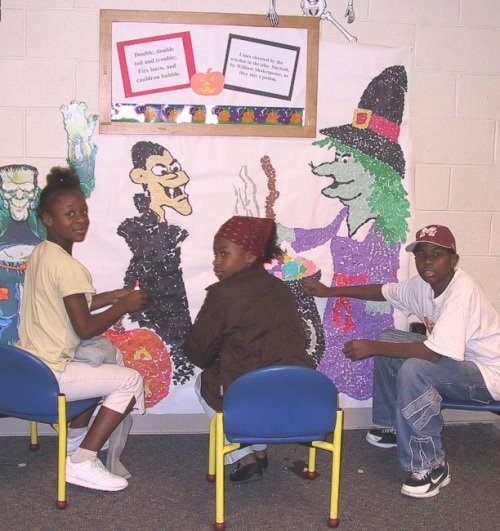
And here's three of the kids working on it Saturday afternoon. They'll love seeing pictures of themselves on my blog. Didn't they do a wonderful job? It's almost finished.


The bulletin board above the mural has the quote from Shakespeare's Macbeth; "Double, double, toil and trouble, fire burn and cauldron bubble...." I figured I might as well make it slightly educational while I was at it. :)

Friday, October 27, 2006

Windy Leaves


WHOOOOoo00ooowwwooooOO
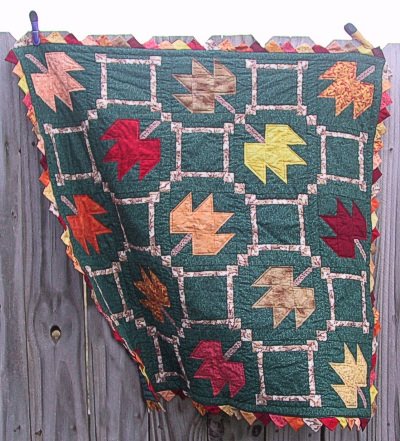
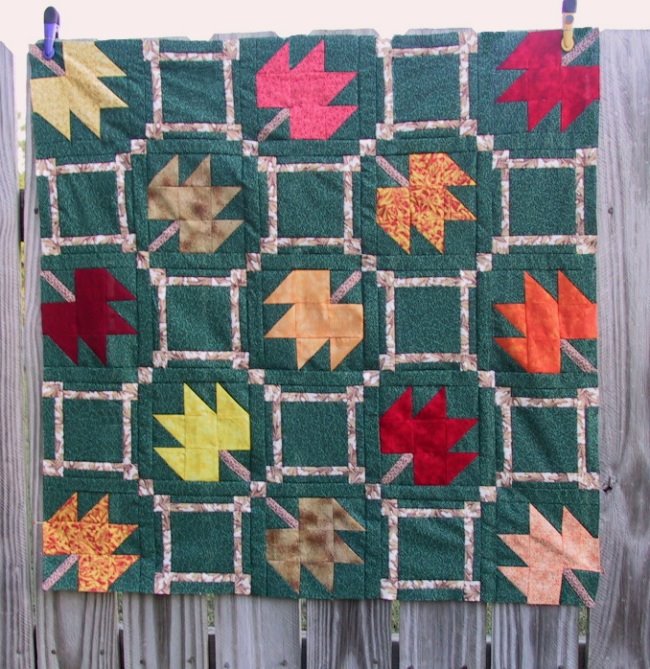
Cloudy, gray, and windy today in Tennessee. I had this finished in time to take it to my guild meeting for show and tell, but it rained the last couple of days so I couldn't get a good picture of it outside.


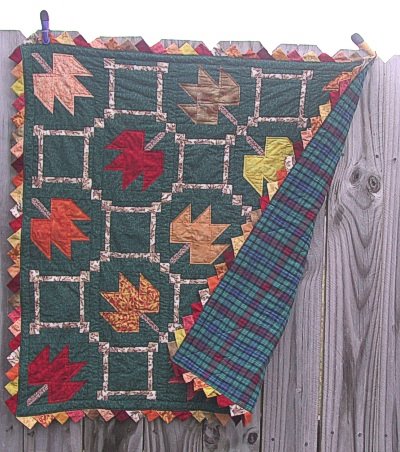
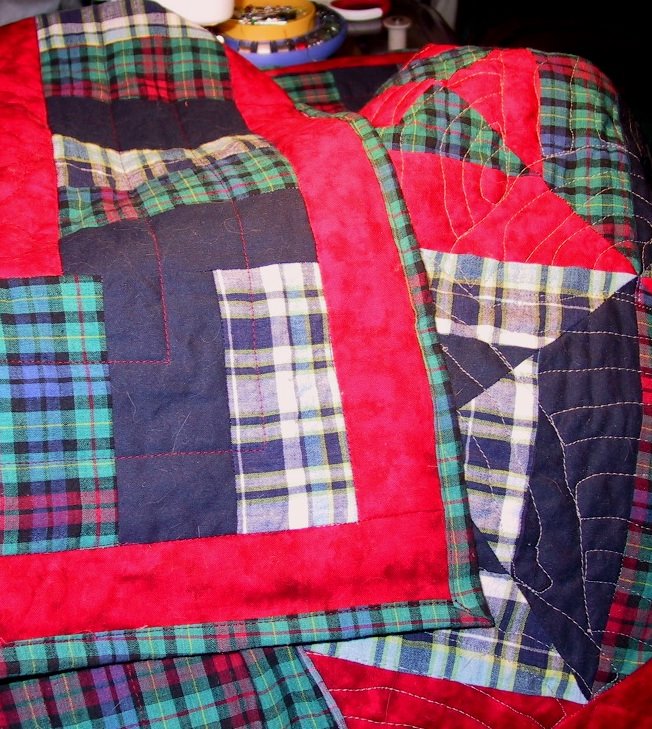
Tried to put the finished leaf quilt up on the fence to take a picture, but the breeze wasn't cooperating!

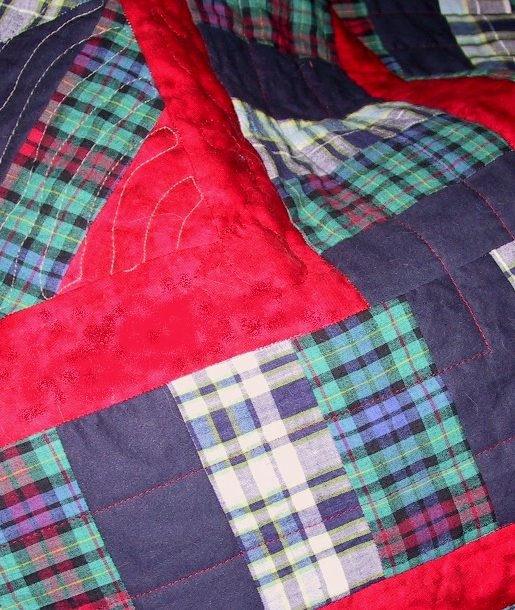
I found these little spring loaded clamps at the store (like clothespins that open big enough to fit a fence board) but that didn't help me with the bottom. The first shows the backing. I used plaid both because it reminds me of Fall - did you ever have a plaid dress for the first day of school, or a plaid bookbag? And because I got a LOT of this 100% cotton shirting stuff when the local fabric giant went out of business. The quilt is just over a yard square, so I wanted something lightweight, it will be used as a wall hanging mostly.


This is the picture where the wind was blowing the least. The prairie points looked better before the quilt was washed. Now I think I need to iron them flat again. Should I try to put some spray starch on them?

Friday, October 20, 2006

Turkey

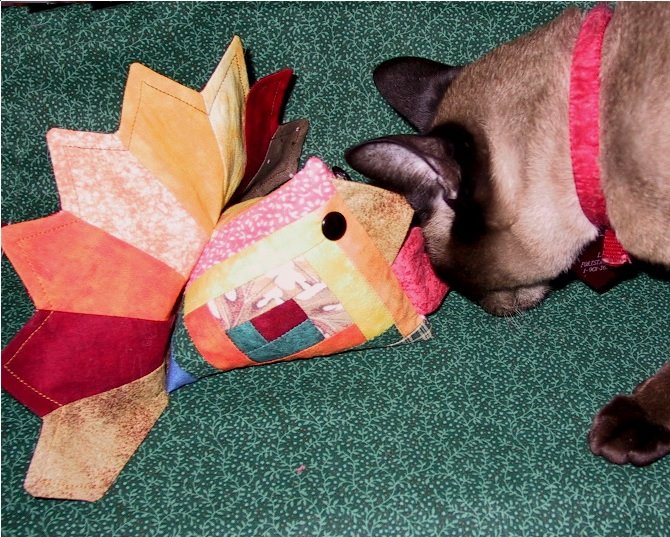
Ok, I just couldn't resist. I'd been thinking about making one of those cute pincushion chickens ever since I'd seen so many posted on people's blogs. And I did have all those autumn colored scraps from my leaf wall quilt that were just begging to be used ... but I decided the season's coming round for turkeys instead!


I was trying to get a side view, and when playing with the contrast of the picture in my photo editing software, I happened to notice a black faced bandit in an area I normally crop out... so instead of increasing the contrast to compensate for the flash, I decreased it to reveal (eeek!) a SPY.


Think she's hearing very important secrets straight from the beak? Or perhaps wondering if she can flip him over and find a turkey leg under there?


I stuffed him with dried peas, so he's more of a beanbag, not a pincushion, and pretty heavy! I haven't decided on a name yet, not Tom, that's totally expected. Any suggestions?

Tuesday, October 17, 2006

Bloglines Folders

Did you know that you can take all your blog feeds (if you use bloglines, which is wonderful) and set them up in different folders?

I've just gone thru my comments for the last month, mainly looking for people who stopped by and had a comment for me, but who aren't on a ring yet, whose blogs I haven't visited.

Interestingly enough, I found that of the 75+ people that I have listed on bloglines, (mostly mavericks and stashbusters) only 40 of those have left me a comment in the last month. And of those 40, there are only 24 that have commented more than once in the last month. Sooooo, I've now got three folders set up, and they're divided neatly into categories:
'People Who Comment a LOT'
'People Who Comment SOME'
and
'People Who Rarely Say Anything'

It's easy to move people from one folder to another, and will certainly make it simple to reciprocate comment wise. And if you don't ever leave ME a comment, then I'll still read your blog, but feel a lot less guilty about not commenting myself.

Bloglines even gives me a separate unread total for each folder, AND I can click on the folder and open all the blogs in that folder at once. :) Pretty cool!

Monday, October 16, 2006

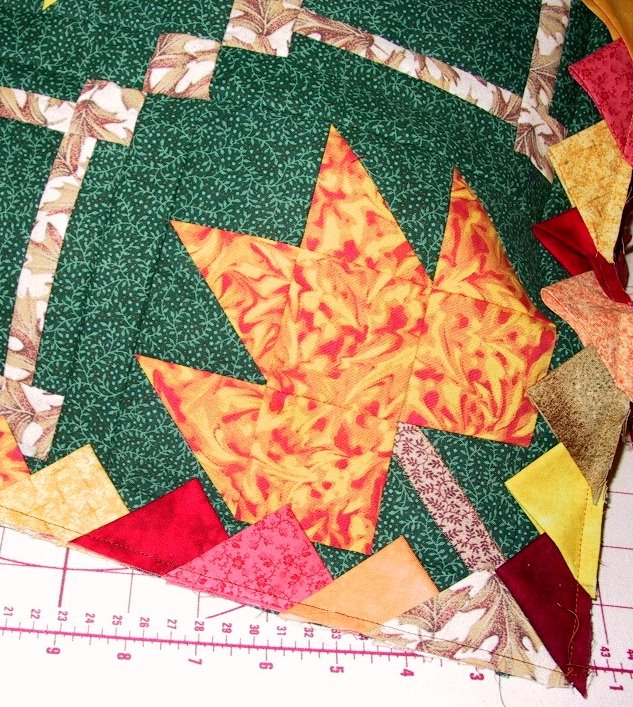
Prairie Points in Progress

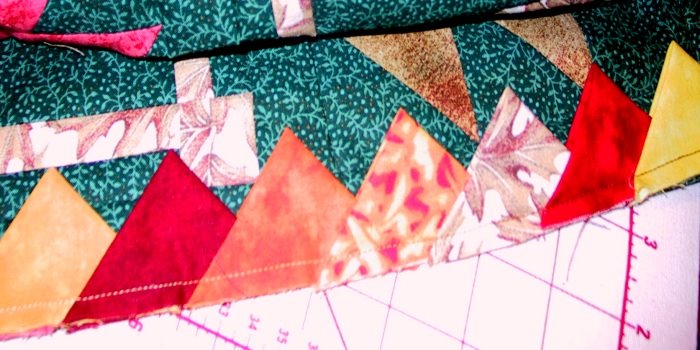
Well, here's what I've been doing this weekend. Ironing more than 100 little 3 inch squares... folding them on the diagonal, ironing them again... folding them on the diagonal AGAIN and ironing them one last time. Uggh, you KNOW how much I love to iron.


Then I pinned them point-in to the border of the leaf quilt. It took me a few tries to decide exactly how far I wanted them apart. I finally decided to nest each one half way into the one before it.


I also decided that I was anal enough to want some kind of pattern, especially with the red, they seemed to jump out more to my eye. So I have a dark red triangle, three random triangles between, then a medium red triangle, and three triangles.


Spacing them halfway into the next one meant that I was continually sewing through 9 layers of fabric. I bet if you want them closer than that, you've really got to have a powerful machine!


I hope the corners work out when I flip them open. I did find a website that suggested matching them like a miter, almost, at each end, so that's what I did.


I've done two corners so far... another 1½ sides to go!

Friday, October 13, 2006

Prairie Point Questions

With final border on, the leaf quilt is 36 inches square (36½ unfinished). I've cut my scrappy squares from all my various leaf fabrics, at 3 inches square. I think I like the look of the points with the opening on the side, that are 'nested' into each other ... but I have some questions.


Does anyone have any hints on how many points look best per side? Should I really nest them deep into each other or only slightly, ½ inch or so? Do I have to pin a whole yard of these before I sew them? eww.

Will it look better if I stick to a pattern of colors for my points? I have 11 different fabrics... or will it look too regimented? But, if I do the color order randomly, some of the colors are brighter or darker, will they draw the eye and look funny if (example) the deep red points are only two points apart on the left side... and spaced by 8 on the bottom, and by 5 or so on the right?

Do people normally put these points on after you quilt the sandwich or before?

Have any of you ever put the quilt top and the backing right sides together, stitched the edges, then turned the whole thing inside out? That way my points would be caught in the seam... but where does the batting fit? I can just see it snagging on the pressor foot if I put it on top ... or getting mangled by the feed dogs, on the bottom.

Advice, plz?

Wednesday, October 11, 2006

I'm an Autumn

Got the link for this from Finn's blog, guess I'm an Autumn too. :)

You Belong in Fall

Intelligent, introspective, and quite expressive at times...
You appreciate the changes in color, climate, and mood that fall brings
Whether you're carving wacky pumpkins or taking long drives, autumn is a favorite time of year for you


I think I've decided to try prairie points on the border for this little leaf quilt... it'll add color to the edge without adding much size. And since it's going to be a wall hanging, it'll let me try the points without committing myself to a whole bed size quilt worth of them. :D

Actually, I'm not sure what to do with the points at the corners, but I guess I can do a search online and find some instructions.

Sunday, October 08, 2006

Inner Squares

I did some extra time on Judy's 'hour a day' quilt today, since I had a nice free afternoon and a couple of DVD's to watch. Besides, I've got a board meeting tomorrow after work, and won't sew at all. Here we go. :)


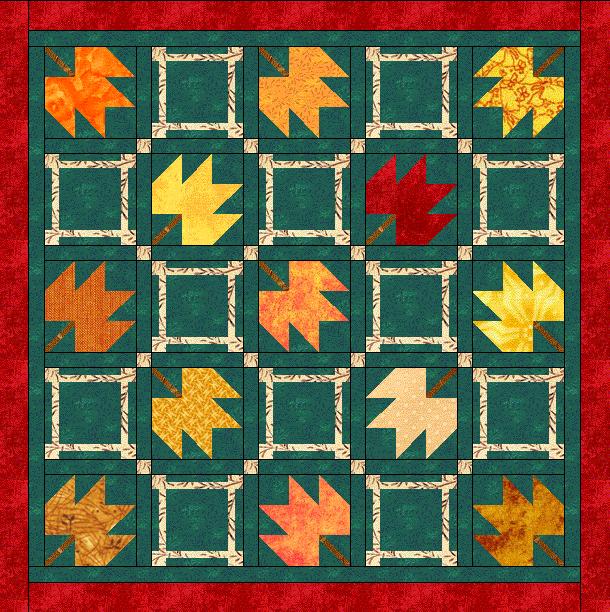
Now for the borders. I'll do an inner solid green one, same size as the sashing, I think, so the leaves and lattice float. Then - still not sure what I want to do with the outer border. I've got plenty of that lattice color, and enough of several of the leaf colors. Lessee, got a choice between that Red/Orange/Yellow swirly stuff... the orange on the right side middle, and the red immediately above it. All the rest of the leaves came from FQ's, so unless I do something pieced, not enough of those.

I'm kind of leaning toward the lattice fabric, beige with brown leaves... what would YOU pick? Then bind it in... more green? A pieced binding? *thinking*

Saturday, October 07, 2006

Leaf Blocks done

I've been working away, just not posting. :)

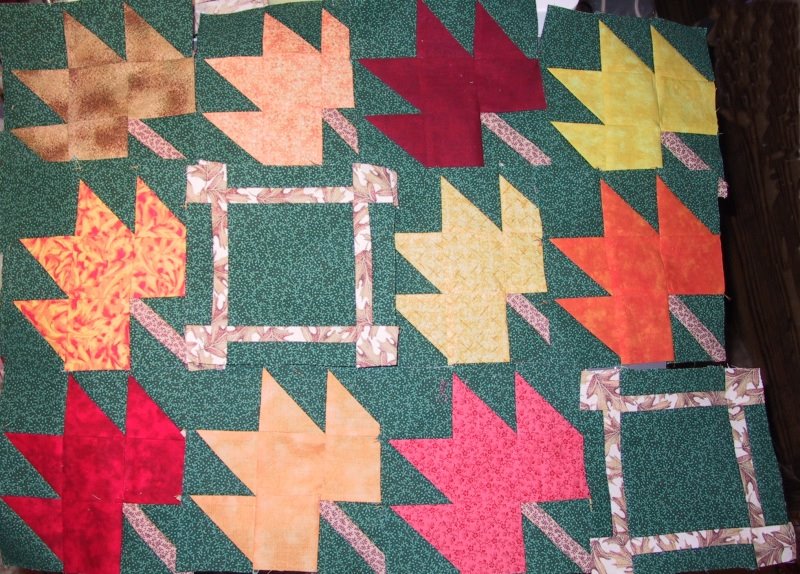
Here's my 13 leaf blocks done (the three on the left are the ones I have duplicated) there's two in each of those stacks, making the 13 I'll need. That one on the bottom isn't really pink, it's more of an orangey red than it looks.


And I've done 6 of the lattice blocks I will need, three in each stack. I've got pieces of the other 6 done, two sides and the middle, just waiting for the top and bottom strip. Then I'll get started on my sashing! If only I didn't have to work all day Saturday... *sighs*

Wednesday, October 04, 2006

Quilt for an Hour Two

My progress today on Judy's Hour a Day Autumn quilt:


I got all the paper torn off all my triangles. I rotary cut the three color squares, and the two background squares for each leaf, AND cut the background green squares for each lattice block. Then I got industrious and cut the stem fabric, seamed it together into a tube, and machine appliqued it down diagonally to 13 of my background squares. I LOVE the little applique stitch on my new machine, this is the first time I've used it. Well, I didn't get the instruction book out, but I used #34 on quilting mode, for you Janome folks, and it looks good to ME. :D

I've still got to cut the last three stems apart... and *confesses* I'm procrastinating on my least favorite job... anyone remember? It'll be the first thing I do when I get home from work tomorrow night, I Promise! Then I can reward myself by sewing my leaf blocks together.

Tuesday, October 03, 2006

Quilt for an Hour project

Well, here goes!

I'm making mine a little different from the one Judy designed - Making it smaller, 6 inch blocks sized for a wallhanging, adding sashing between the blocks, and using my favorite color as background, forest green, of course! My beige for the lattice is an oak leaf print, tans with brown leaf outlines, that should look like the fabric I found in EQ. Here's what I adapted from the EQ file Judy made available:


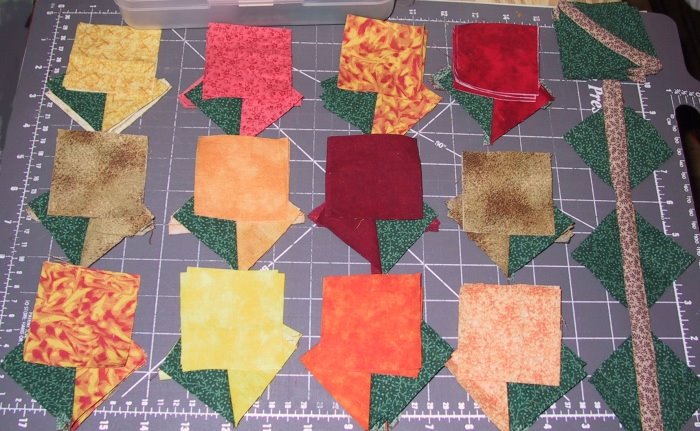
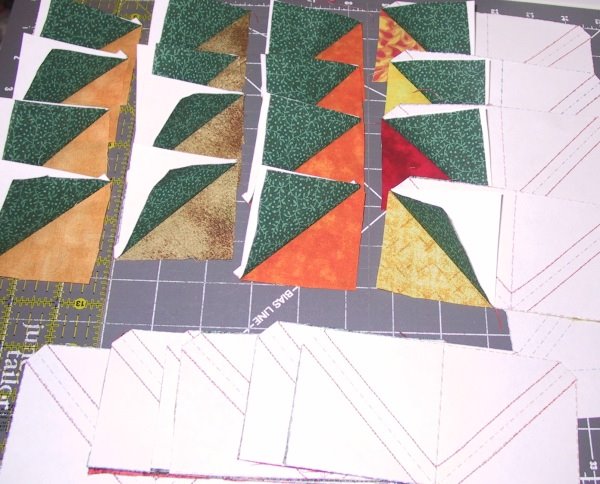
Sunday night I drew out my hst paper in Corel, and printed up enough for all my triangles. Tonight I cut my strips for the leaf triangles and sewed them to the paper, tomorrow at work I'll tear off all the paper on my break. Then my least favorite job of all, iron them. :(

This is what they look like now:


I'm repeating 4 of the colors, one red, one orange, one brownish gold, and the marbley red-orange-yellow that's my favorite. All the rest are different, but heavy on the orange variations.

Saturday, September 30, 2006

Guild Ostrich, final round

Well, for those who have been following my guild's round Ostrich, here's the final page. Anyone willing to proofread it?

October Ostrich Round

And for everyone of you who've provided webpage feedback, suggestions, and corrections before, THANKS!

Now for the meatloaf solution - you guys are so smart, several of you got it right, first guess! Yup, I have a top half, an onion layer, and a bottom half to this leftover meatloaf, three distinct and separate layers. Being single, I make a fairly flat meatloaf, not big tall plump ones, or I'd be eating meatloaf forever.

It was really tasty, though... lol Meatloaf crumbs anyone? I guess I'll have to add some sauce and have sloppy joes tomorrow. :)

Friday, September 29, 2006

Starry Night Design and Onions

I'm so excited. :)

I don't know how many of you have EQ5, the quilt design software, but they have a listserve sponsored by planetpatchwork that I subscribe to. EQ announces challenges and contests and discusses tips for using the program. ANYway, to make a long story shorter, they had a contest to design a quilt for the back of the box for the new version of Electric Quilt that will be coming out in a few months, EQ6.

I missed the deadline for the contest, even though I'd considered sending something in - but then a few days ago, Penny (who works for Electric Quilt) e-mailed me and asked if I'd give permission for one of the quilt designs I'd sent in for an earlier challenge to be used on the new software box. Of COURSE I said yes. Here it is .... :)


I don't do much applique, so this is a design I'd probably never make in fabric. The theme of the challenge I designed it for was Stars. When I first saw the theme, it made me start singing Don McLean's song Starry, Starry Night. I went to go look up Van Gogh's painting on the internet, and tried to do a version of it using the EQ5 software. Anyway, that's MY exciting news for the week. :D

Other information you could use - I was talking meatloaf recipes with a friend, and she said she put slices from the center of an onion on the bottom of her meatloaf pan, then dices the two ends of the onion up fine, mixes it with the meat, eggs, etc. Then I was talking on msn with Ann-Sewsalot and SHE thought it might be even better if the onion slices were in the center of the meatloaf. Well, Ann's a pretty good cook, so I thought, why not? I put about half of my meat-mix in the bottom of my loaf pan, arranged three onion slices on top of that, down the middle, then put the rest of the meat on top.


Patted it all smooth, put it in the oven to bake at 350° ... can anyone guess what happened and why it'd be better to have put the onion slices on the bottom?

I think I'll be devious and make you all guess before I tell you. :)

Monday, September 25, 2006

Pincushion

Well, no, I haven't fallen off the quilt blog, just got busy! Got some new bifocals, and am trying to get used to the different 'wavery' look on the bottom. But they were WONDERFUL for hand sewing the label on my plaid quilt. :)


Here on the left is what I really use for my pins, I found that my little magnetic holder exactly fits inside my catproof bobbin holder. There's both metal and plastic bobbins in there because, yes, my Janome does fit the bobbins from my old Kenmore. (And of course, I found that out AFTER I bought a pack of twelve bobbins at something ungodly like 50 cents each.)

The gray-headed pincushion doll I made at a retreat two years ago, but she looks so much like me that it felt ... almost like voodoo to stick pins in me. Her. Ow! I have bangs, curly gray hair, silver wireframe glasses, and wear shoes like that with no socks for absolutely as long as I can, Spring, Summer, Fall. The round tubbiness is me also. *embarassed grin* I often wear jewel tones too, plum, rose, turquoise, forest green, etc. All she needs is a little siamese cat or two.

The book, Stack a New Deck, is my one quilt book for the year. I'm taking a class at our retreat this November, and have to have the book for that. I'm not one to precisely follow a pattern someone else has made, so I don't often buy books. This one's got some interesting ideas though. My main complaint so far, from just reading her instructions, is that she's a little wasteful of fabric, especially those expensive batiks! For instance, for one quilt, she has you cutting 64 squares 9½ inches in size, using 56 of them, then she says TRIM an inch and ½ off two sides of the remaining eight squares, to make them 8 inches square. Uggh. Not ME. :)

Friday, September 15, 2006

Mostly done!

Well, I took my machine in to the nearest repair place... and they said they'd puffed a few puffs of air thru the tension dial and it was fixed. But I insisted on test driving it there, and it did the same thing for me that it had been doing, after I'd sewn for a while. Then I let them keep it overnight, and this time he said he'd buffed down some little place and sewed a bunch with it, and it was working. And on the two pieces of that felty stuff they demo on, it had sewn ok.

At home, I set it up for free motion, and it was still breaking and snarling. Ann had suggested that I try regular sewing, and with the walking foot, and it does fine... it's just with free motion. The only things I see different are dropping the feed dogs, and using the free motion foot.


I was using 100% cotton gray DMC thread on the top and bottom for the freehand fans I was trying. I tried switching to a stronger cotton/poly red thread and made freehand loops in the inner red border, and still had problems. (You don't see it on the red, I was using red on top and bobbin.) So I took the darning foot off, and put the walking foot on, and kept the red thread, stitched in the ditch between the inner border and the piano keys, and two straight lines perpendicular to the keys, then again in the ditch between the keys and the last red border. Except for a few inches (where I'd been playing with the tension for the darning foot,) once I switched to 'normal' tension for the walking foot, it worked beautifully.

The walking foot is also working well for machine sewing the binding. :)


So I don't know WHAT the problem is with free motion quilting. The ability to do free motion quilting is the main reason I got this new machine a few months ago. If I wanted to piece, or quilt with a walking foot, I have my old Kenmore.

I've tried it with the machine set on slow... medium... and fast. I tried it with the top tension several places on the dial, from loose to tight. I still got breaks in the top thread and loops and snarls of the top thread on the bottom. I think I've picked out more thread this week than in my whole life. Any suggestions, anyone?

And THAT'S why I haven't been blogging... but I promise to get around to all your blogs this weekend!

Wednesday, September 06, 2006

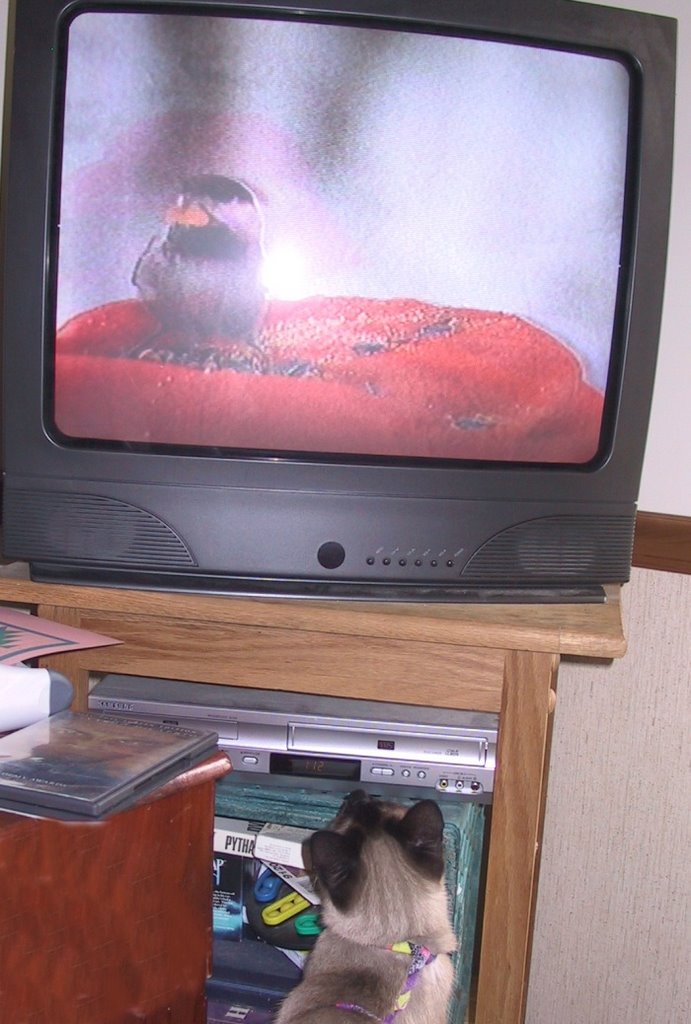
Toby and the TV

Time for a kitty post? I was watching a kids program on PBS this past long weekend, and found a nature show where they built a snowman and watched the animals come to feed in the snow. Here's Toby (who doesn't go outside, and would probably freak out if a fly landed on him) practicing being the great Siamese Hunter. First the cardinals and sparrows caught his eye, eating seed out of the snowman's cap:


Then they showed a hedgehog, there to eat the raisins they'd used for the snowman's eyes, I think. Toby just couldn't stand that little face, paws, and quivering nose on the screen. If it'd been a real hedgehog, he'd have a paw full of prickles:


Finally a herd of deer came to eat the carrots - one nibbled the nose off the snowman, and others ate carrots that were spelling words in the snow.


There were some other cute pix too, esp. the snowshoe rabbit and various other birds flying around, but I thought I'd better limit myself to 3 for the sake of all those quilters who aren't cat people... :) I'd never seen him paying this much attention to TV before. He watched almost the entire hour long show, standing on his hind legs, trying to bat at the things on the screen.


On the quilting front, I'm trying to do some free motion machine fans on the plaid quilt - but my top thread keeps snapping. I think it snags somehow as it goes thru the tension dial. I've tried less tension... and more tension... and even cleaned out the bobbin case thingy, getting more lint than I would have expected from a fairly new machine! Any suggestions? I'm using 100% cotton thread, top and bottom.

Monday, September 04, 2006

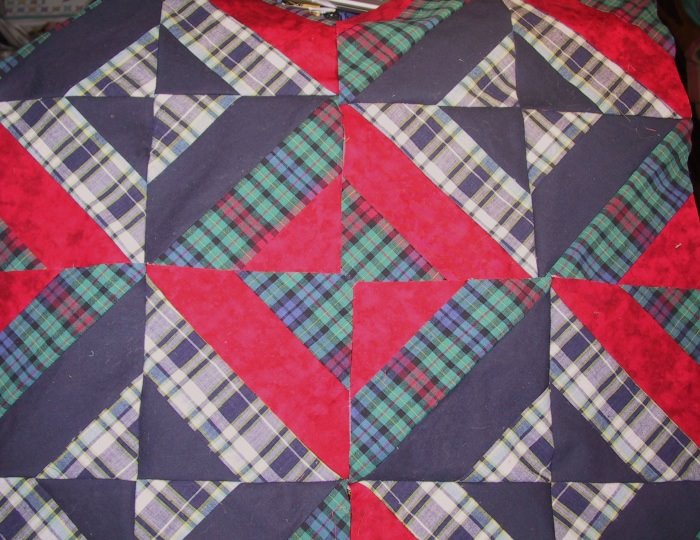
Plaid Top Done

Well, I think this is the quickest little quilt top I've ever made. It finished at 40 x 52, which is a good size for a wheelchair lap quilt.

A big thanks will have to go out to Finn (who we all know and love, but I'll give the link to her blog anyway.) We were chatting on MSN this morning, and she suggested the piano key border instead of the nine patch or 4 patch. She'll have to consider herself the virtual gramma for this quilt. :) Thanks, Finn! It worked!
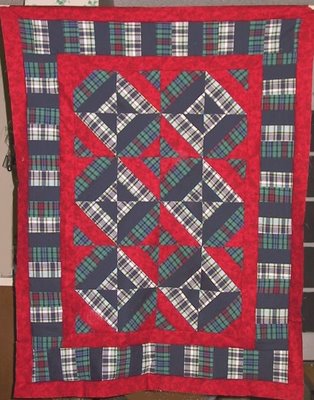


Of course, Bonnie would have to be the other relative to claim this quilt-child - the original inspiration for the 6 center blocks came from her site, the Hidden Spools pattern. I chose a bigger strip size to start with, so my blocks finished a little larger.

I think the original border I'd thought of, with 9 or 4 patch blocks would have been too busy. The piano keys, without the red fabric, worked better.

Since I was trying for a guy type quilt, I've only used four fabrics in this, navy&white plaid, navy; green&red plaid, red; but it doesn't look like a 4 fabric quilt, does it? This picture is probably closer to the correct colors, the red is from a line called 'quilt blenders' and has a lot of darker red blotches on it.

What I've Learned from my First Plaid Quilt:

1. Look for a better plaid fabric before using it on the bias like the center 6 blocks were. This was a loose weave and very stretchy. The red was a quilting fabric and handled the bias much better.

2. Plaids were easy to cut on the straight of grain. This whole quilt top was done with 2½ inch strips. I made sure to start cutting each length of fabric straight, and was easily able to check that nothing shifted.

3. A smaller strip would not have worked as well with a plaid this big. I'll have to remember that the size of the plaid dictates the size of the strips.

4. A little plaid goes a long way! Visually, I guess I should think of it the same way I would a large to medium floral.

Now I have enough plaid to back this one with - I will try to quilt this one on my machine tomorrow instead of sending it off to be done. THEN I have some 'girly' color plaids, with lavender and teals... hot pinks and oranges. That can be my next project. :)
Saturday, September 02, 2006

Red Borders

Well, ok, it's growing on me. The flash is making the red brighter, it's not nearly so loud in person. I made two more of these stretchy blocks so I could make a 2x3 center for this lap quilt. Then added a red border:


Now I'll do a 4 patch or 9-patch kinda border, whatever fits better, using more of the plaids and blue, but no red... and a couple more borders and I'll be done with the top. I think. lol

Friday, September 01, 2006

Another Web Page

Here's the second round to my guild's version of the Round Ostrich. Anyone want to help me proofread it or offer ideas?

Link to September Rounds B & C

If anyone has any good ideas for rounds D & E I'll take suggestions too!

I've also been working on making some blocks from that plaid material I got back when my local Hancock's was going out of business. I'm using a pattern from Bonnie's site, called Hidden Spools, but I'm not as happy with it as I thought I would be.


This is my first 4 blocks, not sewn together yet, which is why the plaid in the middle looks funny. :) Bonnie warned that there would be all bias edges - but on this loosely woven plaid fabric, there's a LOT of stretch.

I can't decide if I need to go on and put some straight-of-grain sashing in now, or sew these 4 together THEN put a border around it. It'll be a wheelchair quilt for my guild's charity challenge, so there's no exact size requirement I'm going for.

The red was supposed to cheer it up some, when I put the blue and plaids together, it looked too dreary... there IS another plaid with a lot more red that I plan to use for this one too. If I put sashing between these 4 blocks, I could use that to help blend in that red. But if I sash the blocks, I'll lose that red spool in the center. Any hints, anyone?
Related Posts Plugin for WordPress, Blogger...